
Application management
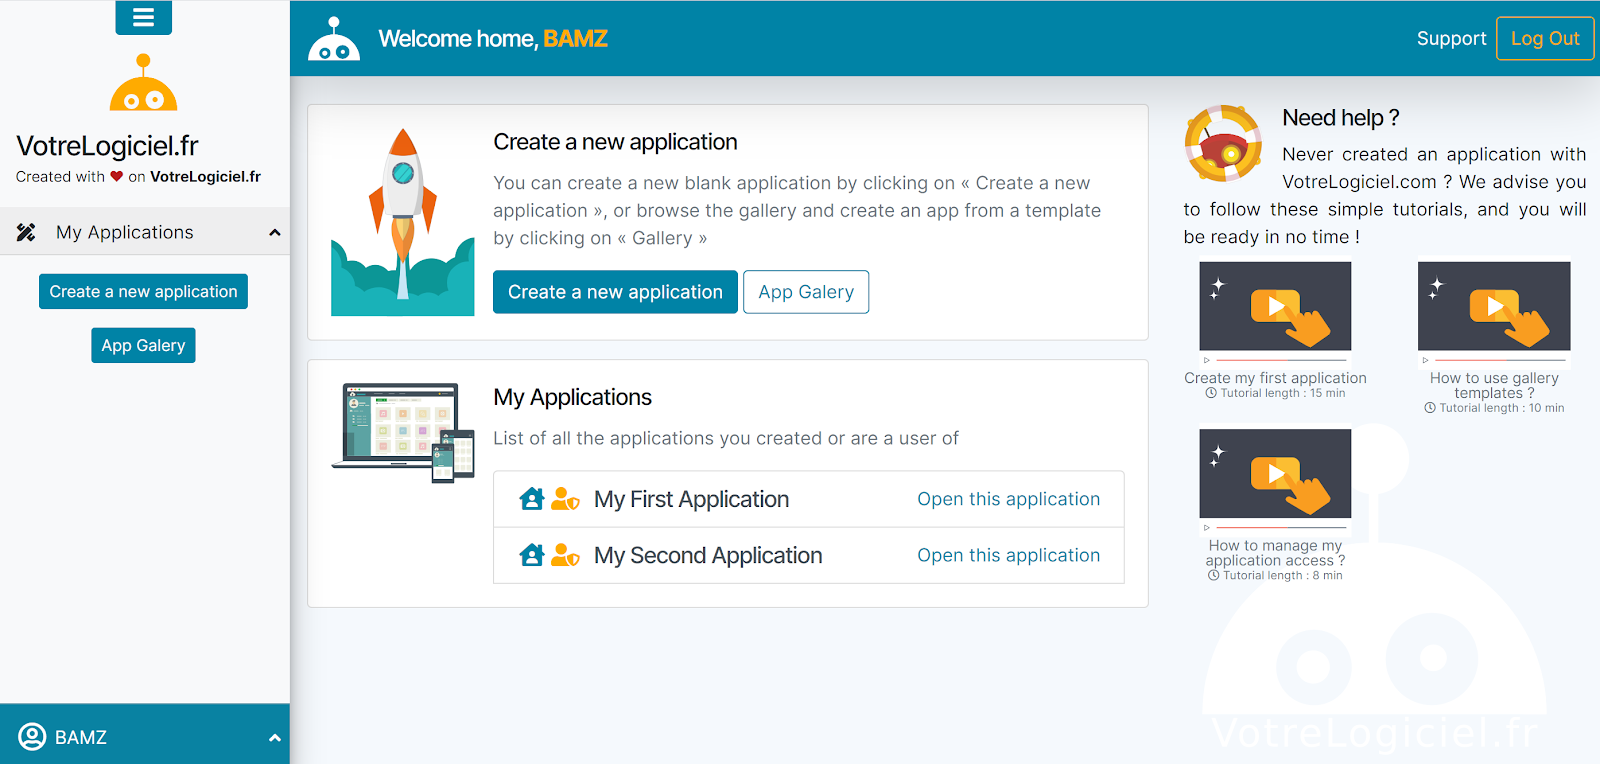
After logging to our BAMZ account, we’re landing on our BAMZ home page:
We can then create a new Application or just access to one of our applications we previously created.
Create a new application
To create a new application, we can decide to start from a blank empty application or to use an Application Template from the Gallery that will be cloned to create our future application. The second option is interesting if the Template we found is already closed to the application we want to design. Anyway, we can still start from scratch with a blank application and later use the Template import feature to add the functions from an Application Template we like.
Create a blank application
We just need to give the name of the Application and that’s it.

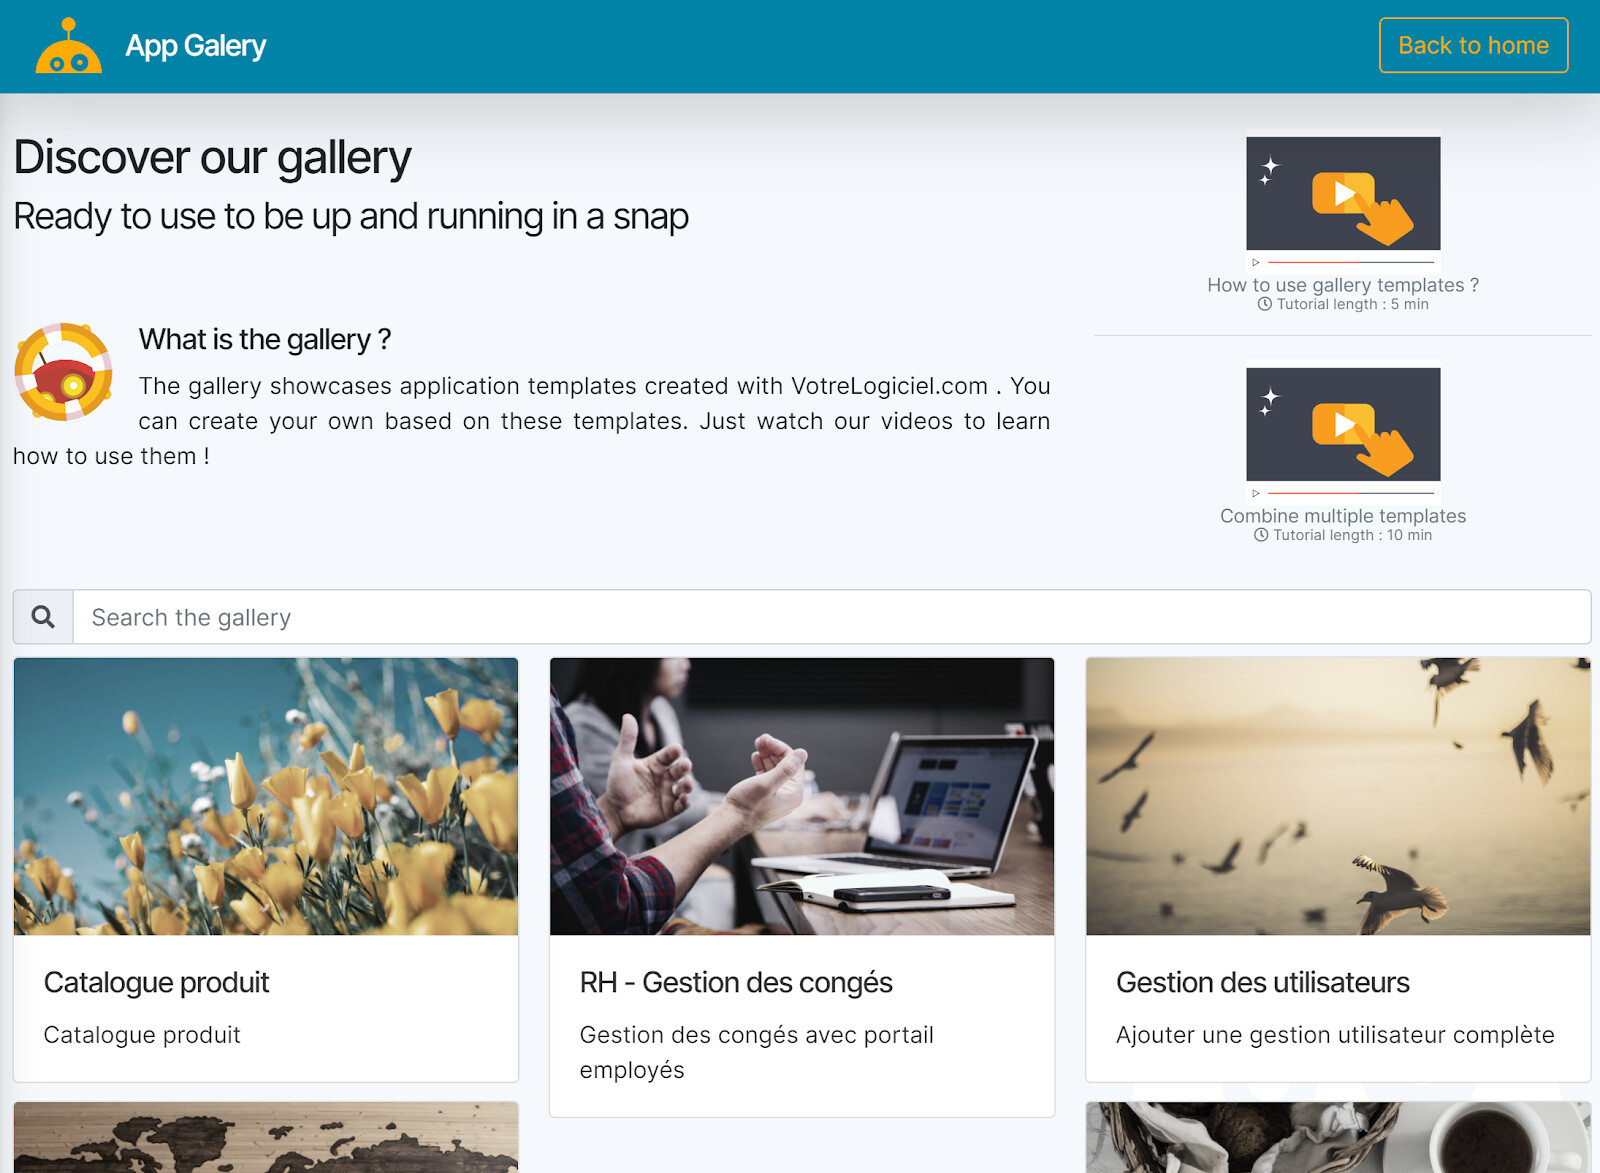
Use the Gallery of Application Templates
Just look at the gallery of Application Templates and choose the one you like.
You can access to the description of the Template:
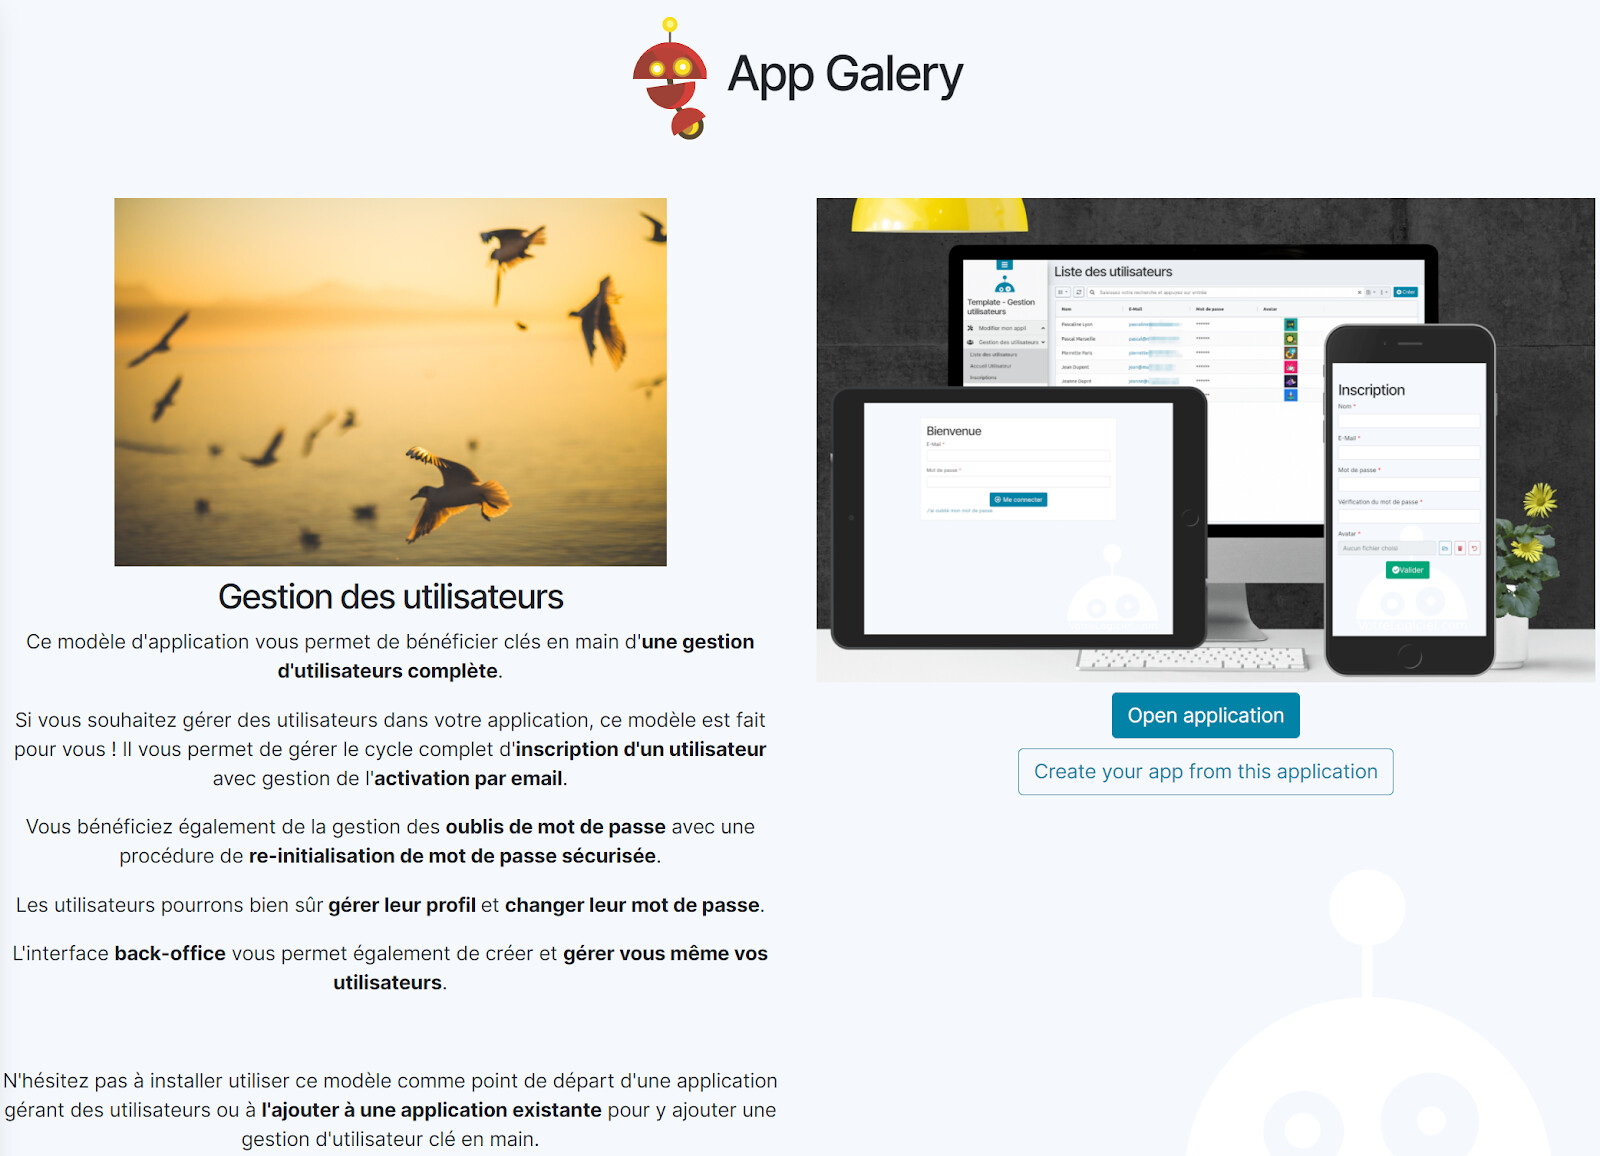
The “Open Application demo” feature lets us try the template full functions without any restriction.
After choosing the Application Template we want, we can now clone it to create our application with the “Create your app from this application” feature.
Start our new application
If it’s your first application, we strongly suggest you to go visit our tutorial section that will introduce to you how to start a project to create an application.
For the beginning, we should focus on how we organize our data, then how we display this data in screens, and at the end, how we custom the design to match our brand image.
Application settings
To change the application settings, we go to Global Settings:
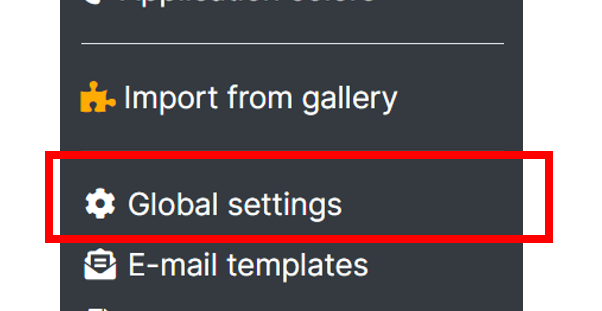
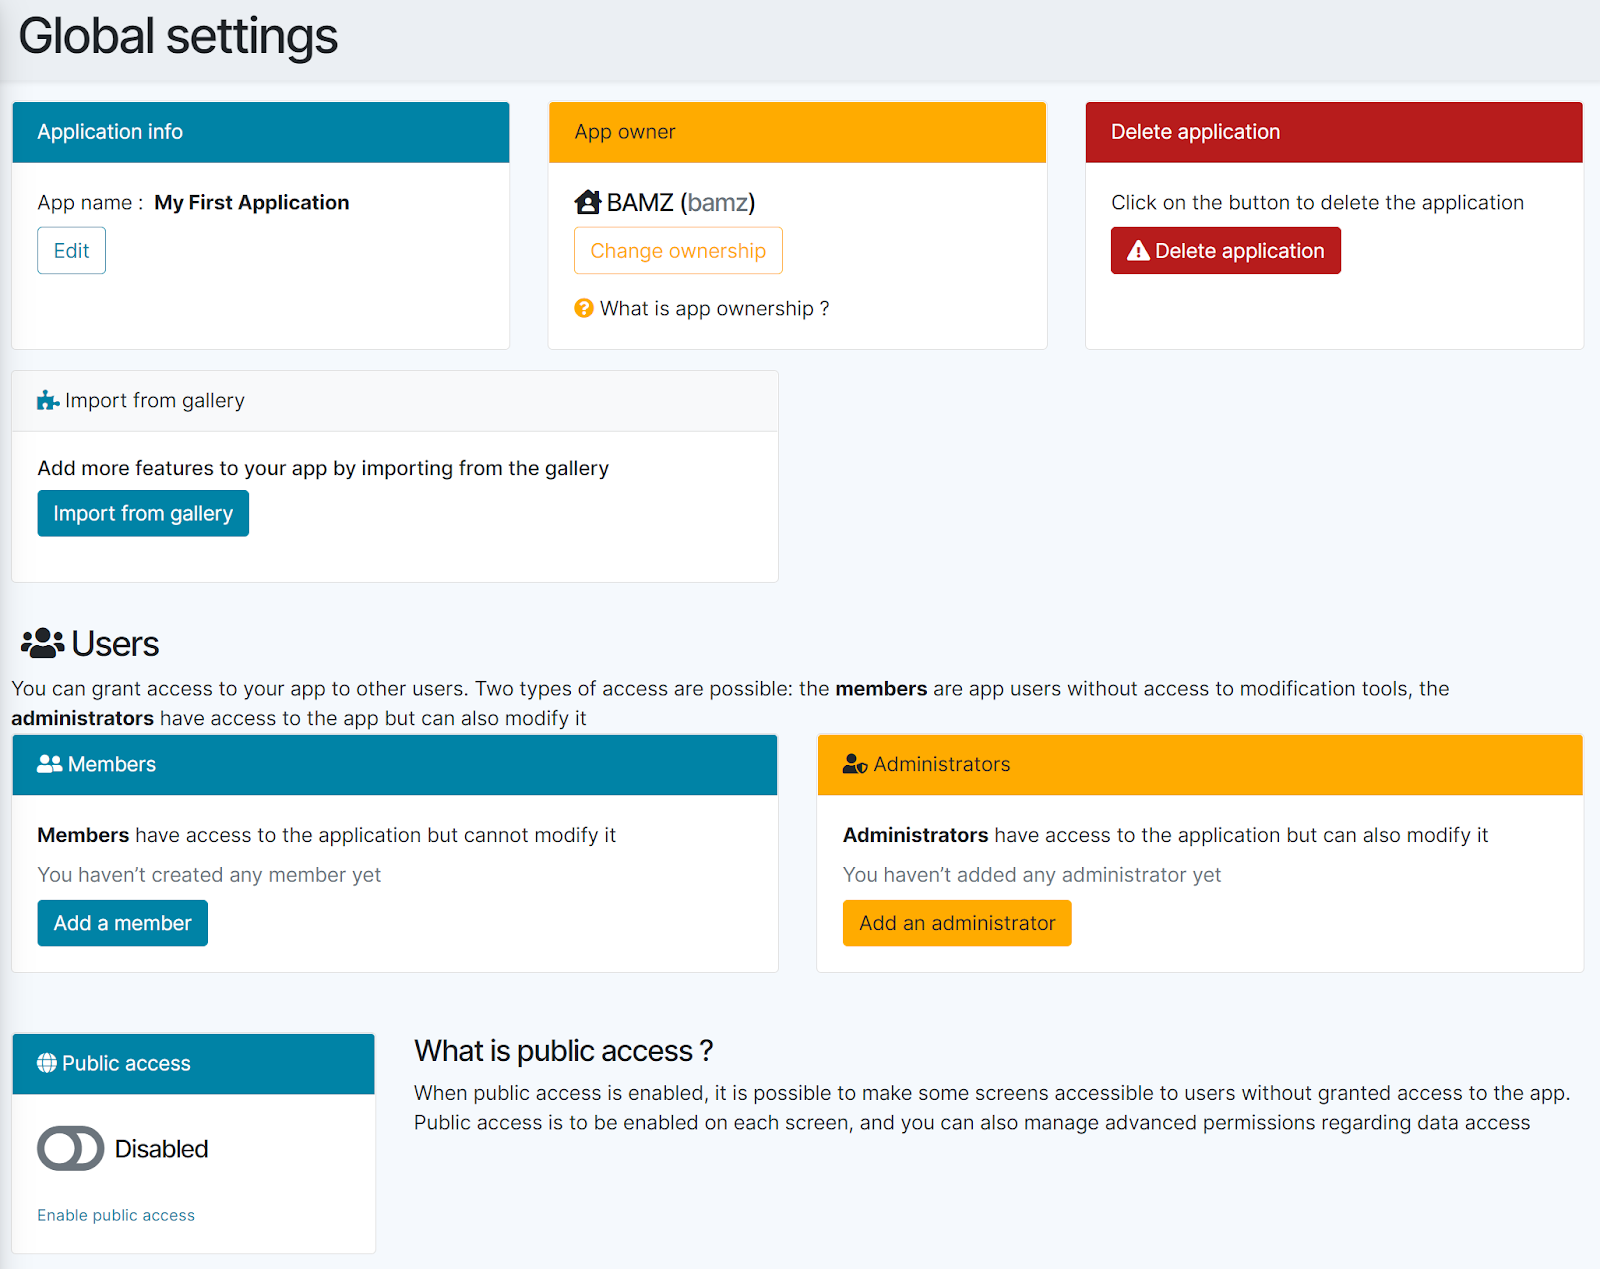
We can change the name of the application, delete the application (definitely!), or import some features from the Application Templates by visiting the Gallery.
There is also 2 other important settings: the Public access and the Ownership and User rights of the Application
Public Access
We can set the Application to be a Public application: it means that the app users don’t need to be connected with a BAMZ account to access the application.
But it is not enough to let everyone use the application. We will have later to decide which screens public users can freely access without identification.
For example, if we want to make an application to publish a catalog of products. We will create some back office screens for the company to create, modify and manage the products, and we will create a catalog with search function and product details to let our customers visit our products. The application will have to be set as a Public application, but of course our back office screen will not be public. It’s only for our company members and they will have to login to access the product list and details to be able to update the information.
And the screens for the customers, the catalog and the product screen, will be set as Public to let any anonymous customer use the application and find the product he is looking for.
Application ownership and user rights management
The owner of the application is responsible for the application, its usage and its content. He is the owner of the data in front of the GDPR regulation policies, and the person responsible for the application usage following BAMZ policies and code of conduct. His BAMZ account will be the account billed according to the selected plan (see BAMZ pricing).
The creator of an application is the first owner of an application, and usually there is no need to change it. But it’s still possible to change the ownership of a BAMZ application: for example, a developer creates the application on behalf of his customer. At the end of the project the developer can transfer the application ownership to his customer who will eventually support the costs of usage.
Data management
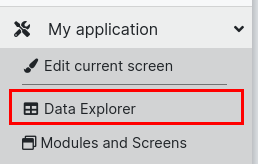
To manage the data of the application, we go in Data explorer :
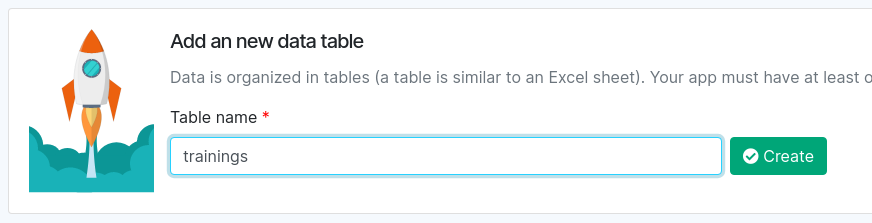
Create a new table
To create a new table, we input the table name and press « Create »
Once the table is create, it is displayed :
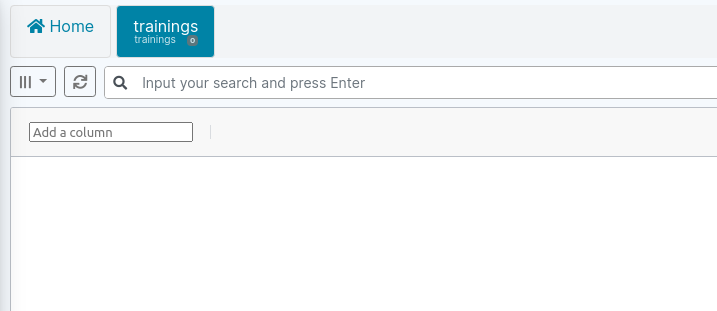
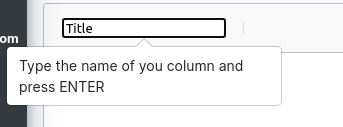
Create a column
To add a column, we enter the column name and press ENTER key :
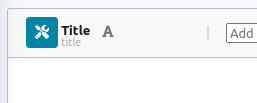
Once the column is created, it is displayed :
Column code
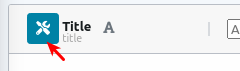
The column technical code is displayed below the column name :
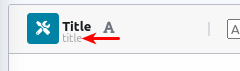
This code is automatically generated from the column name.
Column type
The type of the the column is displayed as icon :
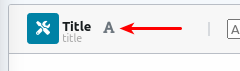
By default the column is created as type text (max length 128)
Type of data
To change the data type of a column, we click on the settings button :
It opens a settings popup :
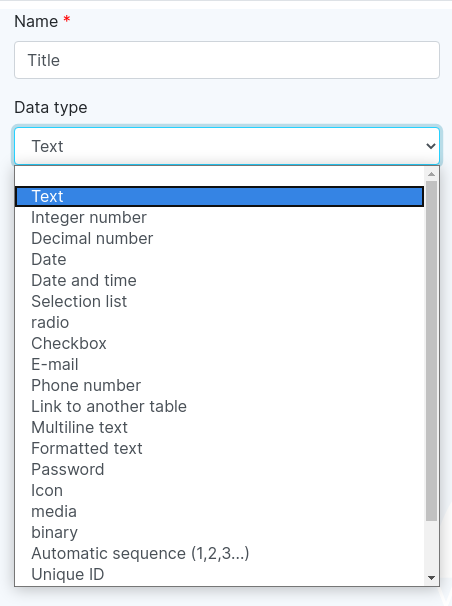
Type text
A text data column will contain some textual data (mono line), with a limited length (128 characters by default).
In forms, it will be displayed as an input text field :

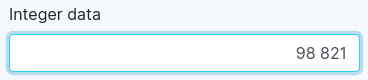
Type Integer
The integer data column will contain integer numbers (1, 2, 3, ….).
In forms, it will be displayed with number masking input :
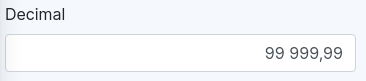
Type Decimal
The decimal data column will contains decimal numbers (1.2, 23.34, 123.99).
In forms, it will be displayed with decimal number masking input :
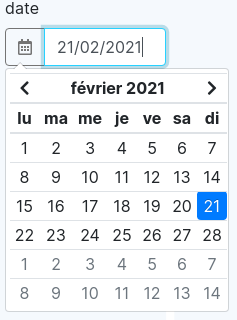
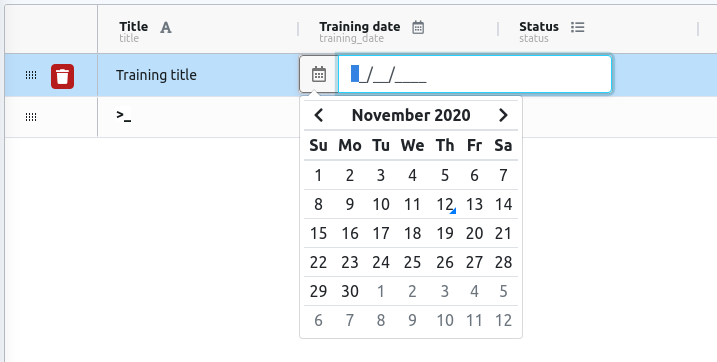
Type Date
The date data column will contains date (without time).
In forms, it will be displayed with date masking input and date picker :
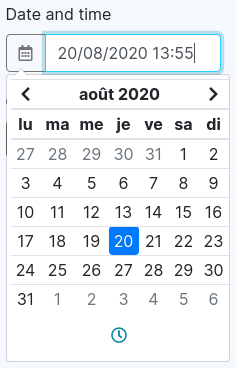
Type Date and Time
The date and time data column contains a date and time.
In forms, it will be displayed with date and time masking input and date and time picker :
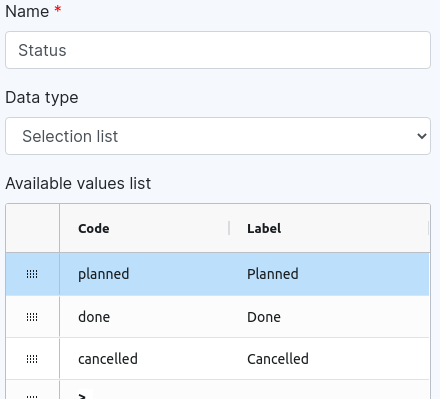
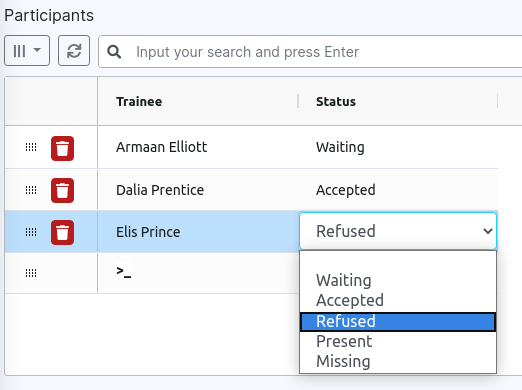
Type Selection list
The selection data column contains a value chosen in a selection list.
On settings, we must set all the possible values(code) and associated label :
In forms, it will be displayed by a selection list showing the labels:

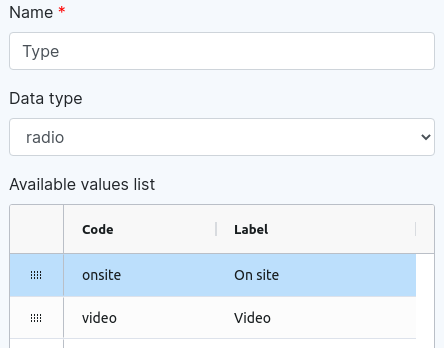
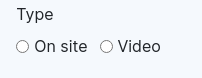
Type radio
The radio data column contains a value chosen in a selection list.
On settings, we must set all the possible values(code) and associated label :
In forms, it will be displayed by a radio list of the labels:
Type checkbox
The checkbox data column contains a value true/false.
In forms, it is displayed by a checkbox :
![]()
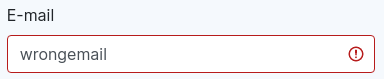
Type E-mail
The e-mail data column contains an e-mail address.
In forms, it is displayed by an input field with email address format check :
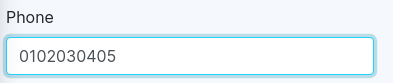
Type Phone
The phone data column contains an phone number.
In forms, it is displayed by a normal input field, the only differences is that on mobile device, it will open the numpad keyboard :
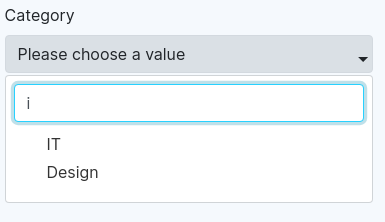
Type link to another table
The link to another table type will add a link to a record in another data table.
On the settings, you must choose the other table and which column to use in the selection search :
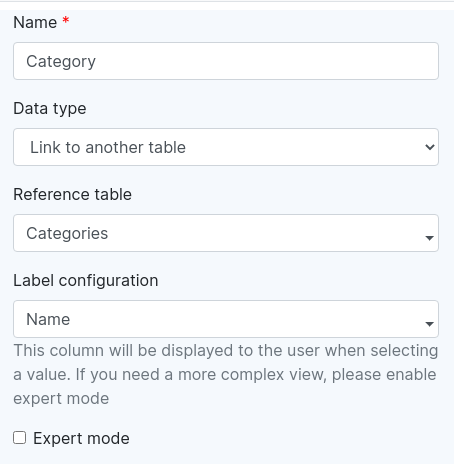
In forms, it is displayed as a search field :
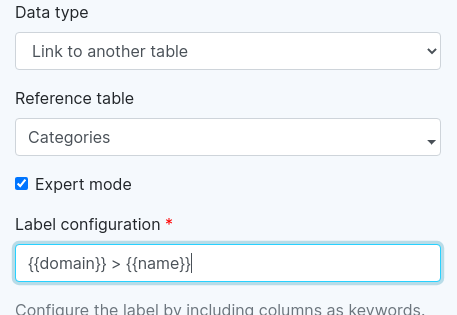
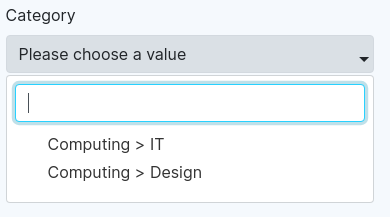
In expert mode, it is possible to add a more complex label configuration :
Type Multiline
The multiline data column contains a text with many line.
In forms, it is displayed by a textarea :

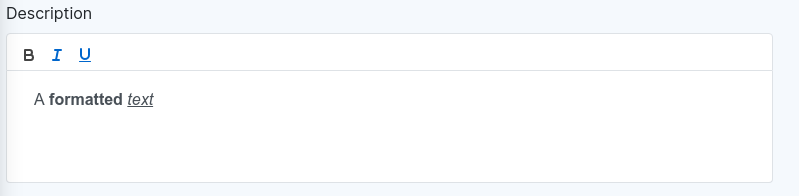
Type Formatted text
The formatted text data column contains a text that can be formatted.
In forms, it is displayed with a rich text editor :
Type password
The password data column contains a password. The password is stored in database with bcrypt encryption.
In forms, it is displayed a password input field :

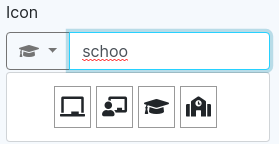
Type icon
The icon data column contains an icon chosen in Font Awesome free icons library.
In form, it is displayed as an icon picker field :
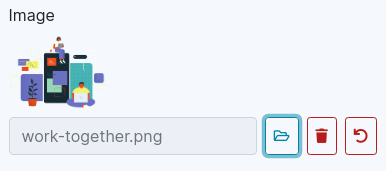
Type media
The media column contains a media file (image, video or sound).
In forms, it is displayed with a preview and a file picker :
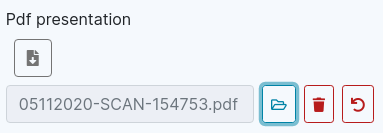
Type binary
The binary column contains a binary file.
In forms, it is displayed with a download button and a file picker :
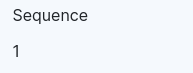
Type automatic sequence
The automatic sequence type contains a number that is automatically incremented for each line.
In forms, it is displayed as read-only information :
Type unique ID
The unique ID type contains a random unique string (UUID) that is automatically generated by server.
In forms, it is displayed as read-only information :

Type lines from another table
The lines from another table type contains many lines of another table inside this table.
In forms, it is displayed as input table :
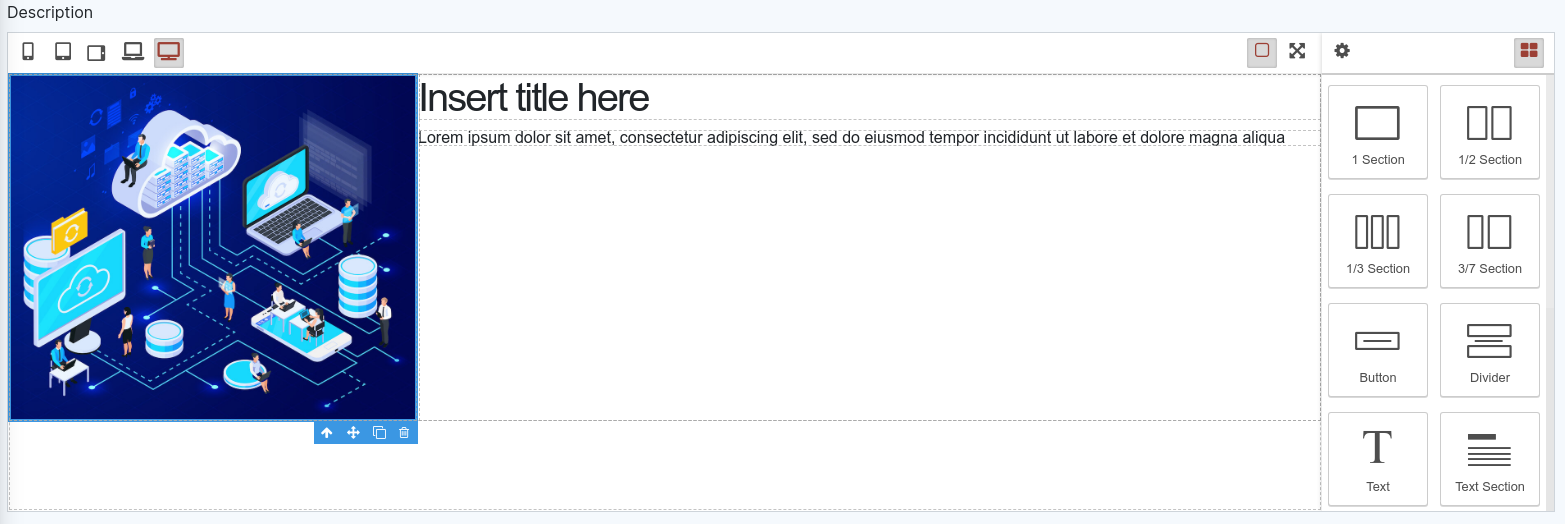
Type compositor HTML
The compositor HTML type column contains HTML complex layout.
In forms, it is displayed as a full HTML graphical editor :
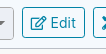
Edition of data
It is possible to modify the data directly in the data explorer using the button Edit :
When we clicked on the button, the table is switched to edition mode :

We just input our data in the table, it is saved when we leave a cell
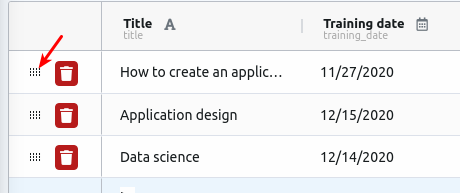
We can reorder the line with the handle on the left on the line
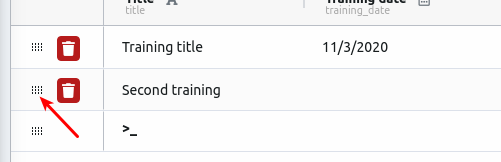
To leave edit mode, click again on the “edit” button.
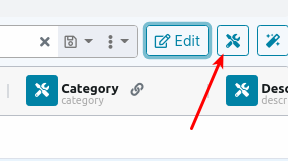
Advanced options on tables
To open the advanced options, we click on the settings button on the top left
Delete the table
From this screen, we can delete the table :

Be careful as it will also delete all the data stored in this table!
Access rights
It is possible to add special access rights on the table. The access right can be set to 3 type of BAMZ users :

- Administrators are the user to whom you give admin rights (in global settings)
- Standard users are the member users of you application (still in global settings)
- When we activate the public access to our application (in global settings), all users that are nor admin neither member are anonymous access
The table has 4 access rights : read, create, modify and delete :
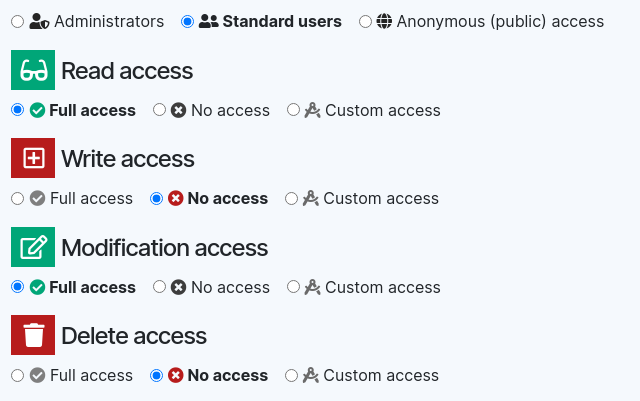
For each right, we can give :
- Full access : the user has access without restriction
- No access : the user don’t have this right at all
- Custom access : the right is subject to custom test
Custom access
The custom access allows us to write some code to check if the user has the right for this record. For example this custom access allow anonymous user to read records having the status column equals to “public”
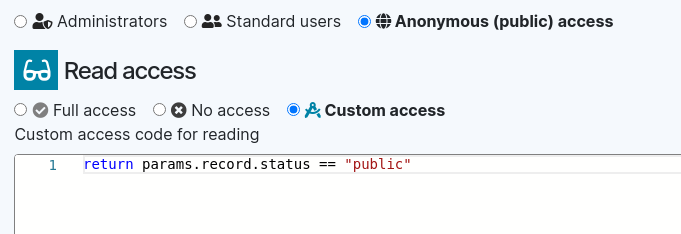
The code is written using javascript syntax. It receive a params object which contains 2 properties :
- record : the record to check
- user : the current user. Itself containing 2 properties :
- login : the login of current user (“anonymous” if it is an anonymous user)
- profile: contains “NORMAL” (member or admin) or “ANONYMOUS” (anonymous user)
Automatic actions
We may need to do some automatic actions on data when it is created, modified, deleted or read.
The usage may be for data check, for example, here we check before each creation and each modification that the date should not be before today :
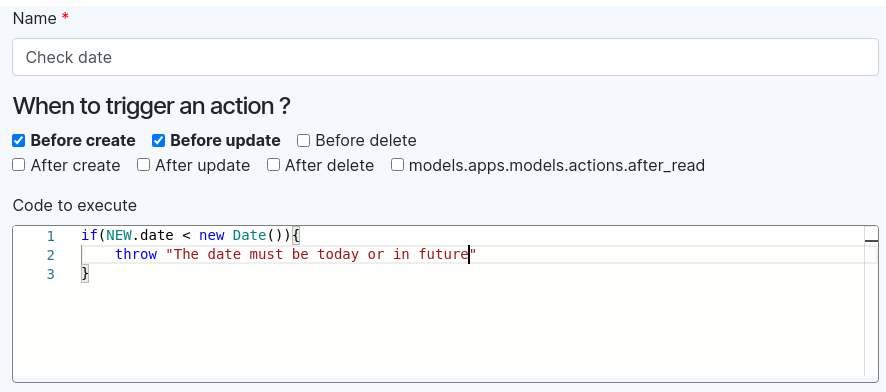
Tips: Why do we do this check on the server and not on the screen side ? Because the automatic action runs on the server so we are sure that the user cannot change the date of its computer to bypass the check!
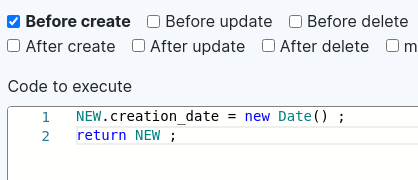
Another usage is to set some automatic values, for example, here we set the column creation_date to the current date before create the record :
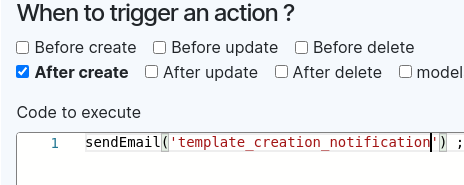
Another usage is to send email. For example, here we send an email automatically after the record is created (for email template, see template settings)
Yet another usage is to interact directly to the database using SQL queries :

keyword NEW
The NEW keyword refers to the new version of the record.
It is available for the following cases :
- Before create
- After create
- Before modify
- After modify
keyword OLD
The OLD keyword refers to the old version of the record before modification
It is available for the following cases :
- Before modify
- After modify
- Before delete
keyword RECORDS
The list of records to be read. It is available for the following case :
- After read
return instruction
For “Before create” and “Before modify”. If we need to modify the data to save (the NEW keyword), we must use the instruction “return NEW” at the end of our code
For “After read”, if we want to modify the record read (the RECORDS keyword) we can use “return RECORDS” instruction at the end of our code
throw instruction
If we want to return an error and stop the process, we can use the throw instruction : throw “My error message”
The action will stop an nothing will be save in database (even if we are “after create” or “after modify”)
function sendEmail
We can send an email using the sendEmail function.
The simplest usage is to just call it with the email template (see templates section) code : sendEmail(“my_template”)
The data used for the template would be the NEW record.
If we want to use another recipient or data we can user the form : sendEmail(‘model code’, dataToUser)
Screen edition
Modules and Screens
An application can have many screens and there are many ways to create screens.
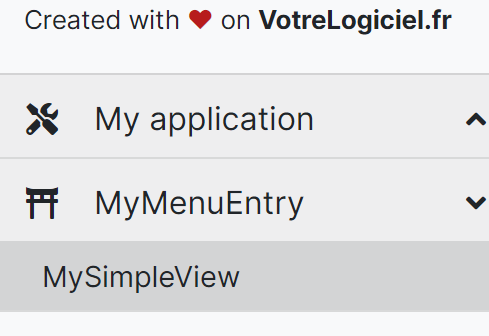
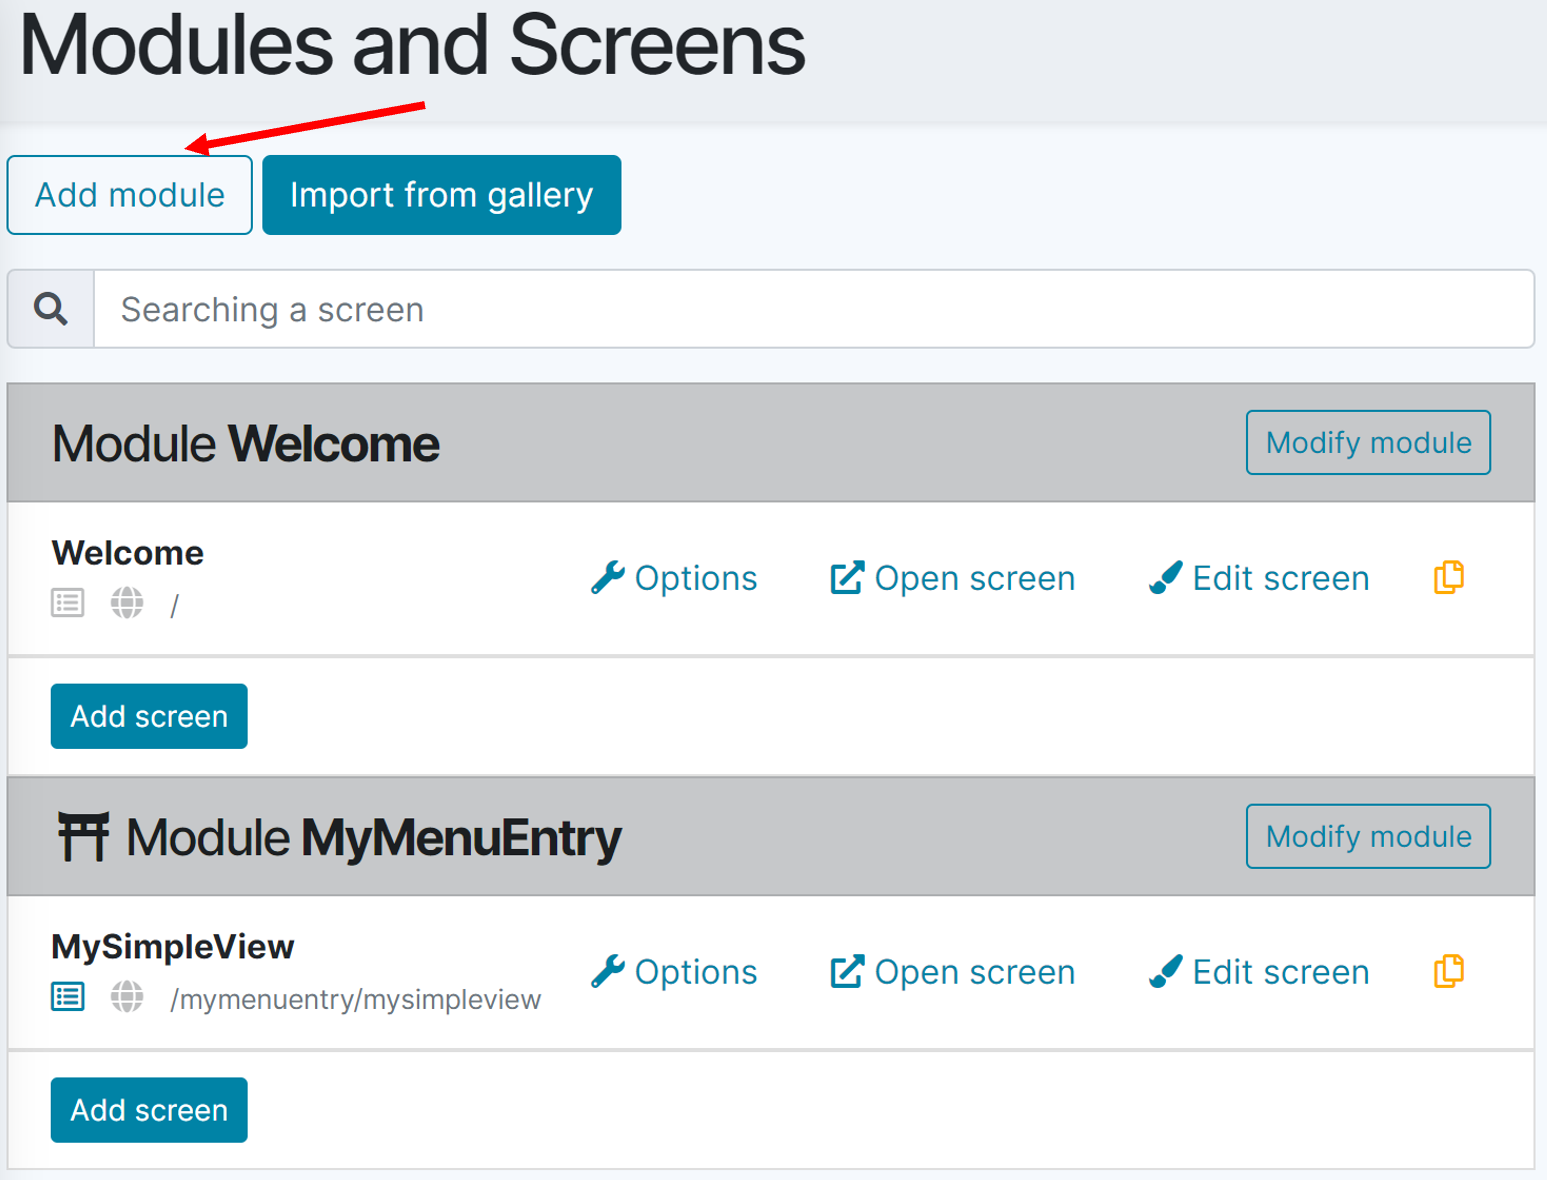
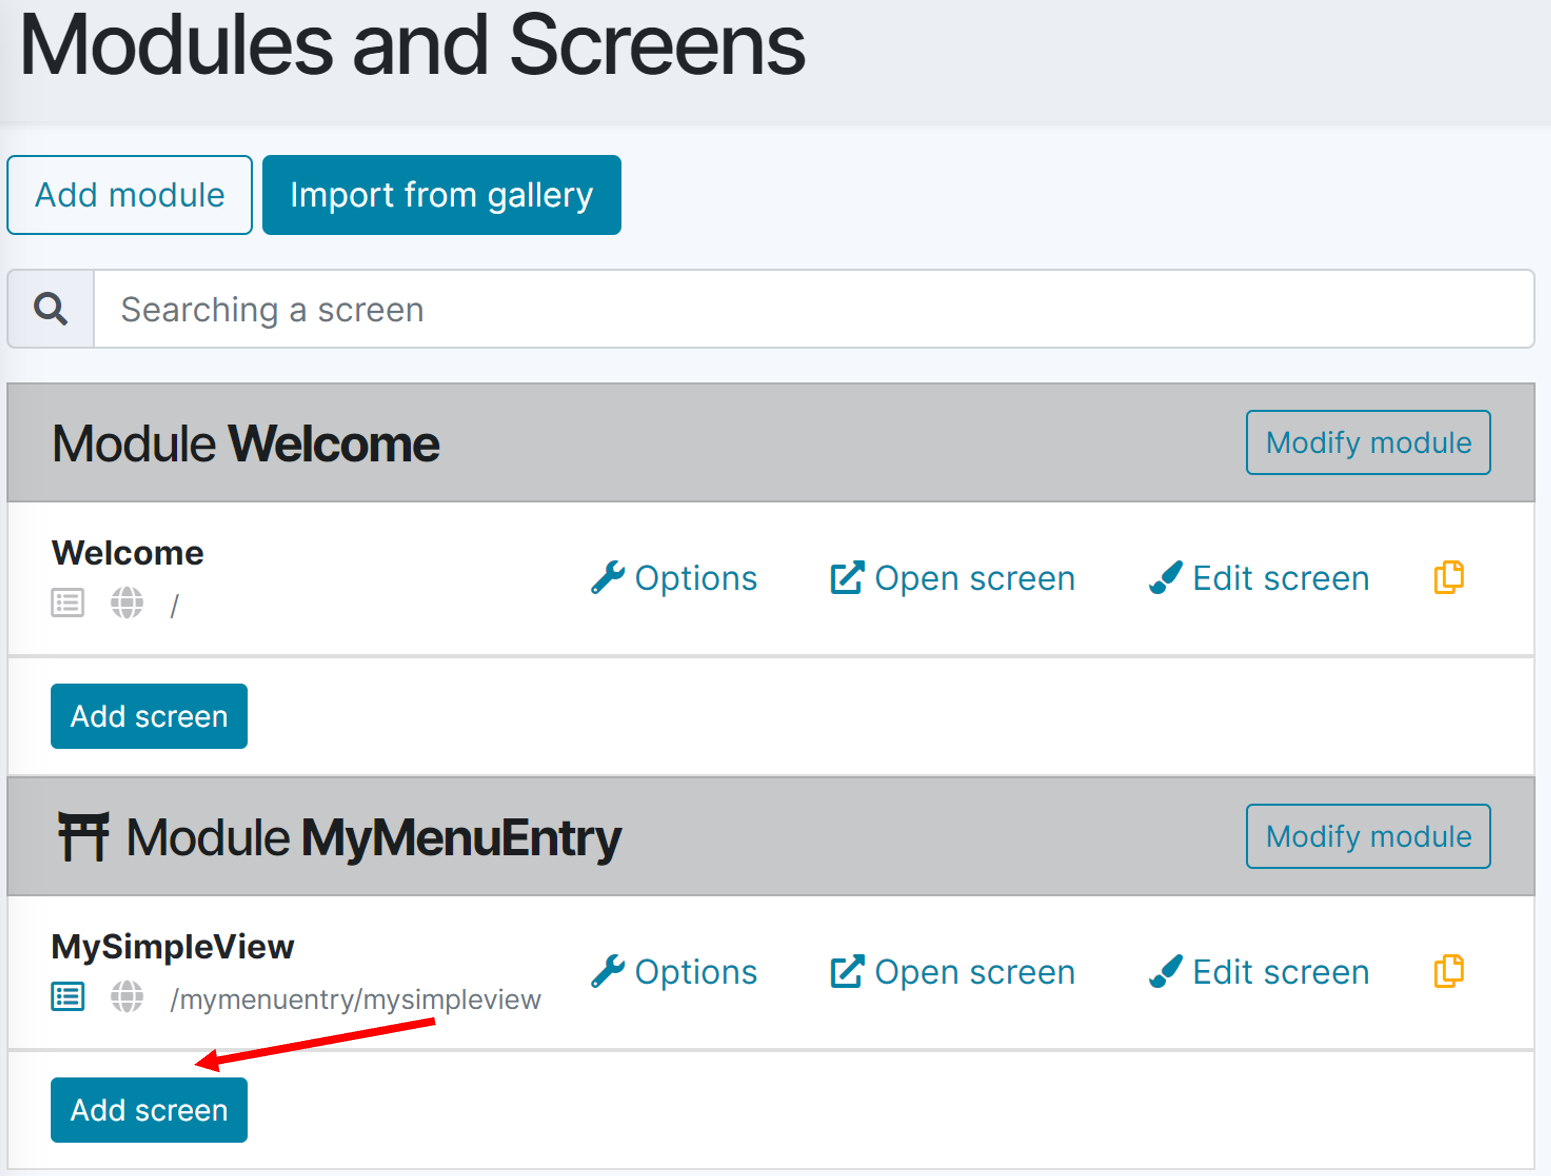
The screens of our are stored and organized in the Modules and Screen entry:
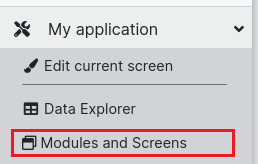
The screens are organized inside Modules. The Modules are the main Entries in the left menu of the application.
To create a new Module entry in the menu:
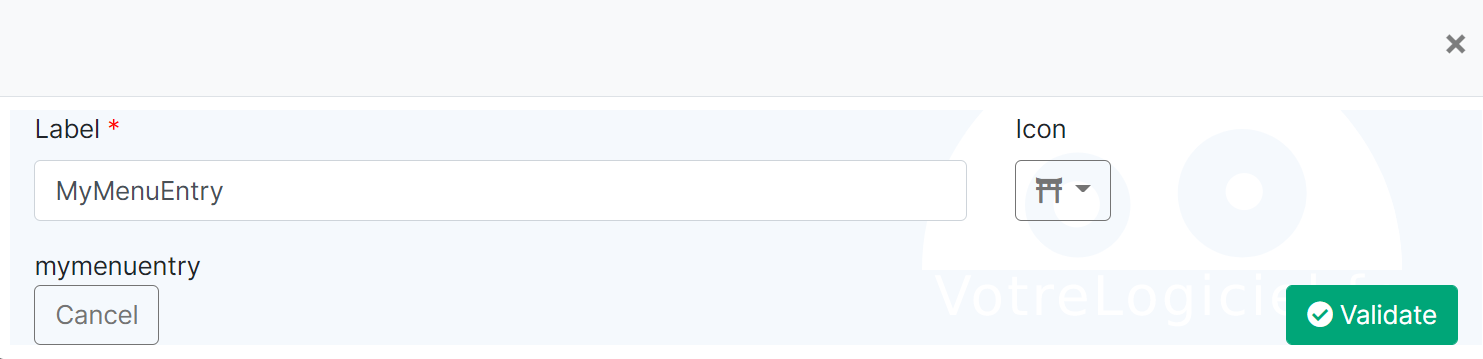
Then we choose the name and the icon we want for this menu entry:
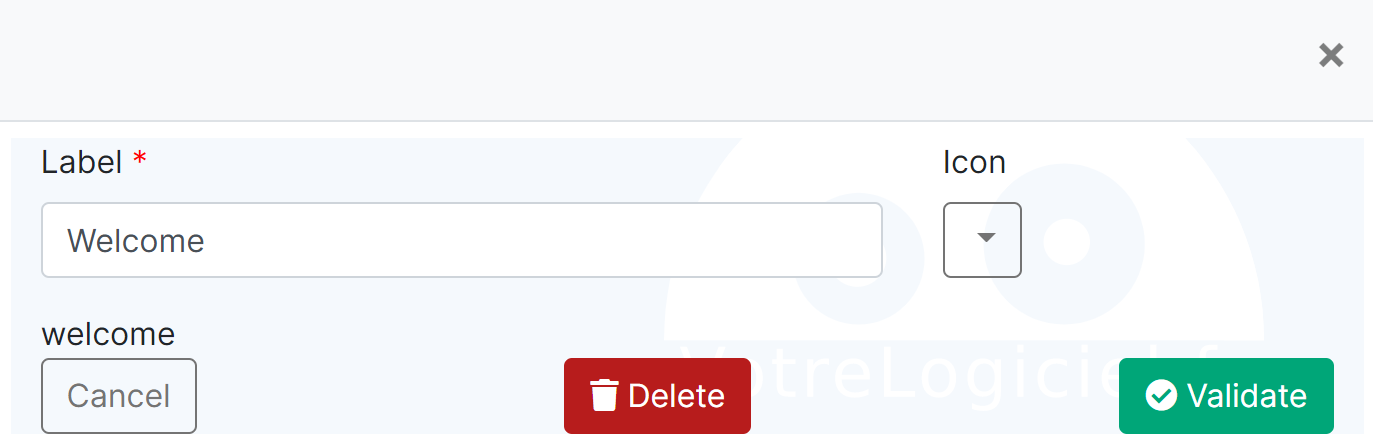
After the Module creation, we can still come back and modify the module settings:
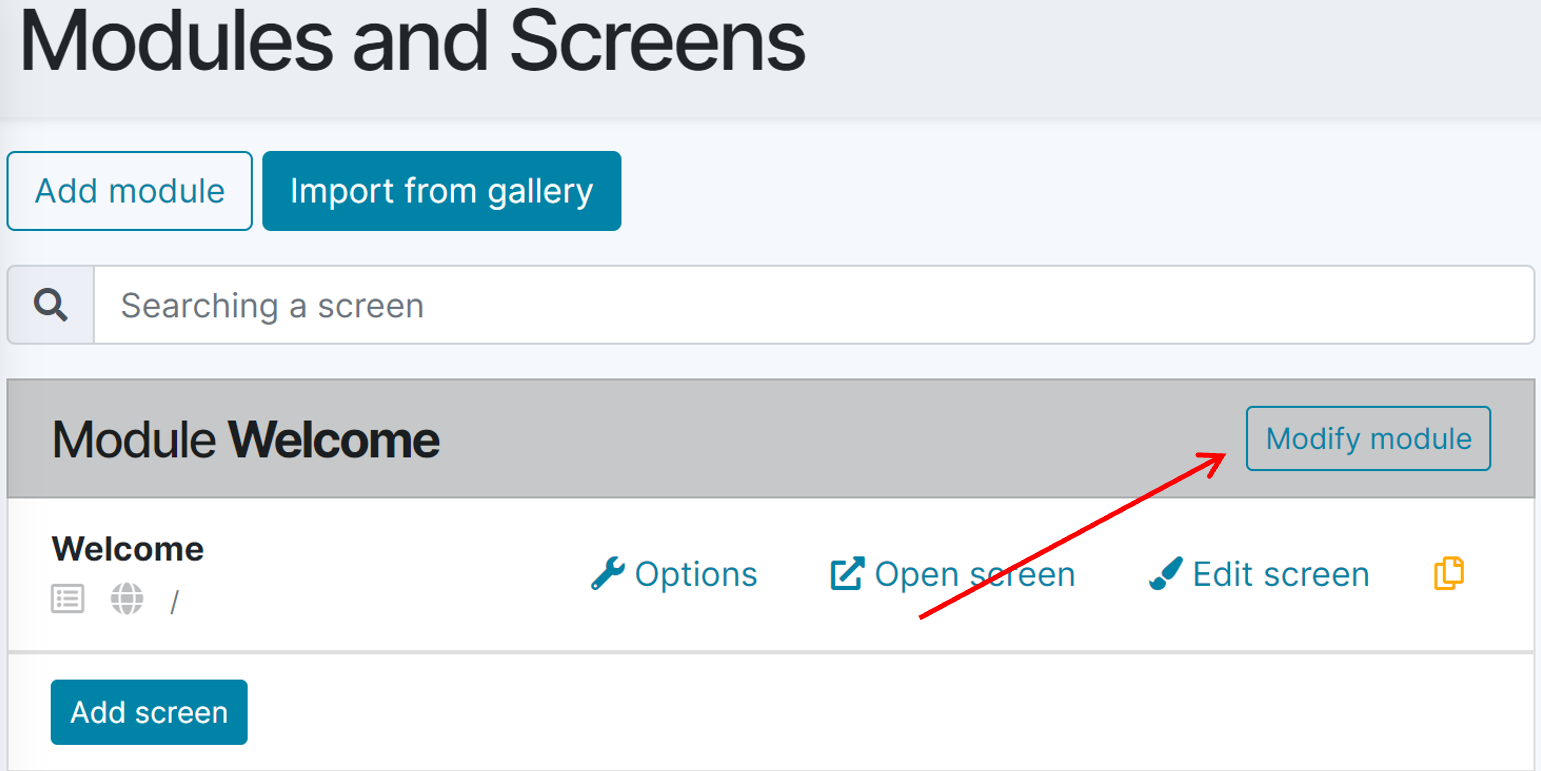
We can change the entry label and the icon, and we can also delete the Module if we finally don’t need it:
Note : if we don’t want our app users to use the application menu, we will need to go into the settings of the screen (more information about Screen Settings here) and choose to not display the screen in the menu. If a Module has no screen displayed, then the Module entry is automatically removed from the menu.
Screen models
The simplest and easiest way to create a screen is to choose one of the available screen models:
There are actually 6 screen models available that we can use:
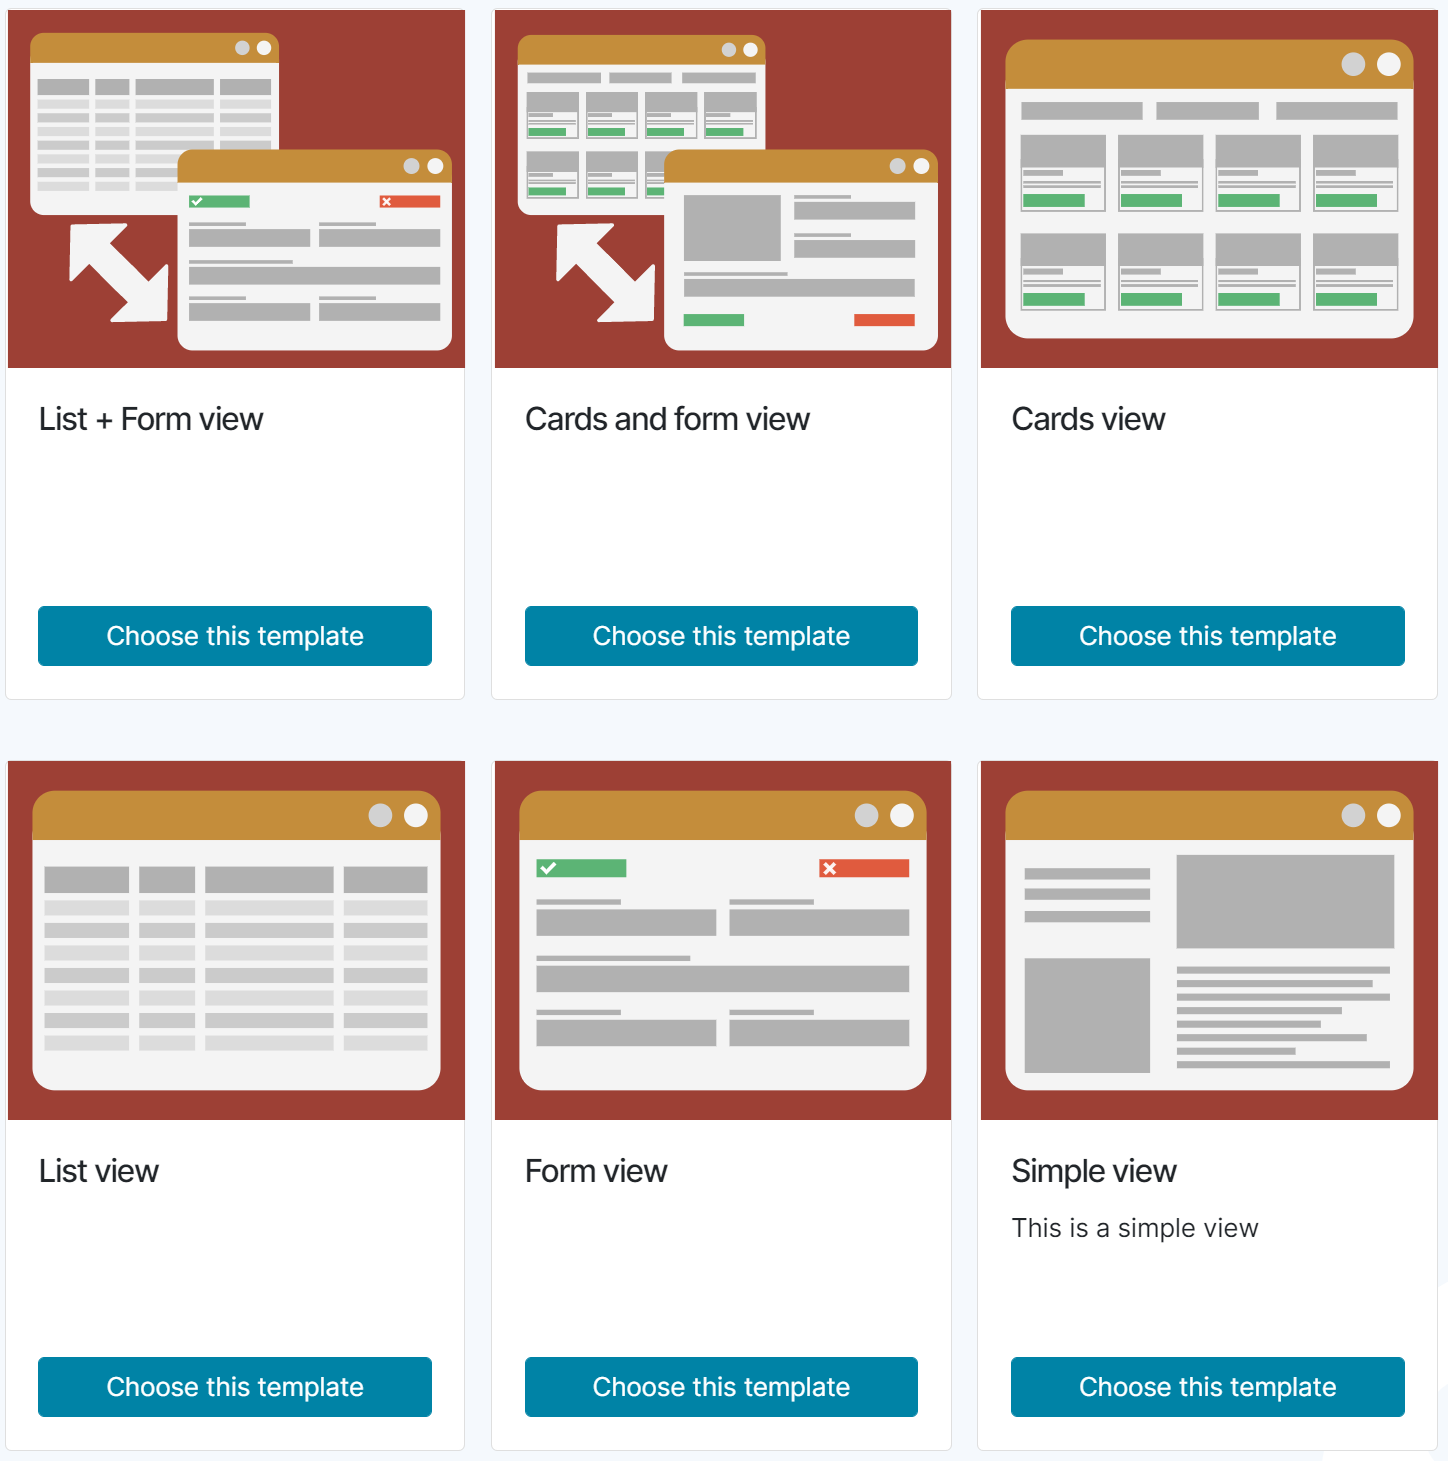
The most basic screen is the Simple View, it’s a blank page that lets us design whatever we want. The other models are more evolved as they already contain graphical elements in a custom layout, with links to our data tables. Of course we can choose an evolved model and modify completely the screen by removing or adding any new graphical element. There are also 2 extended models that will not create 1 but 2 screens: one screen will be the list of records from a table, and the other screen will be the detail of each recorded data.
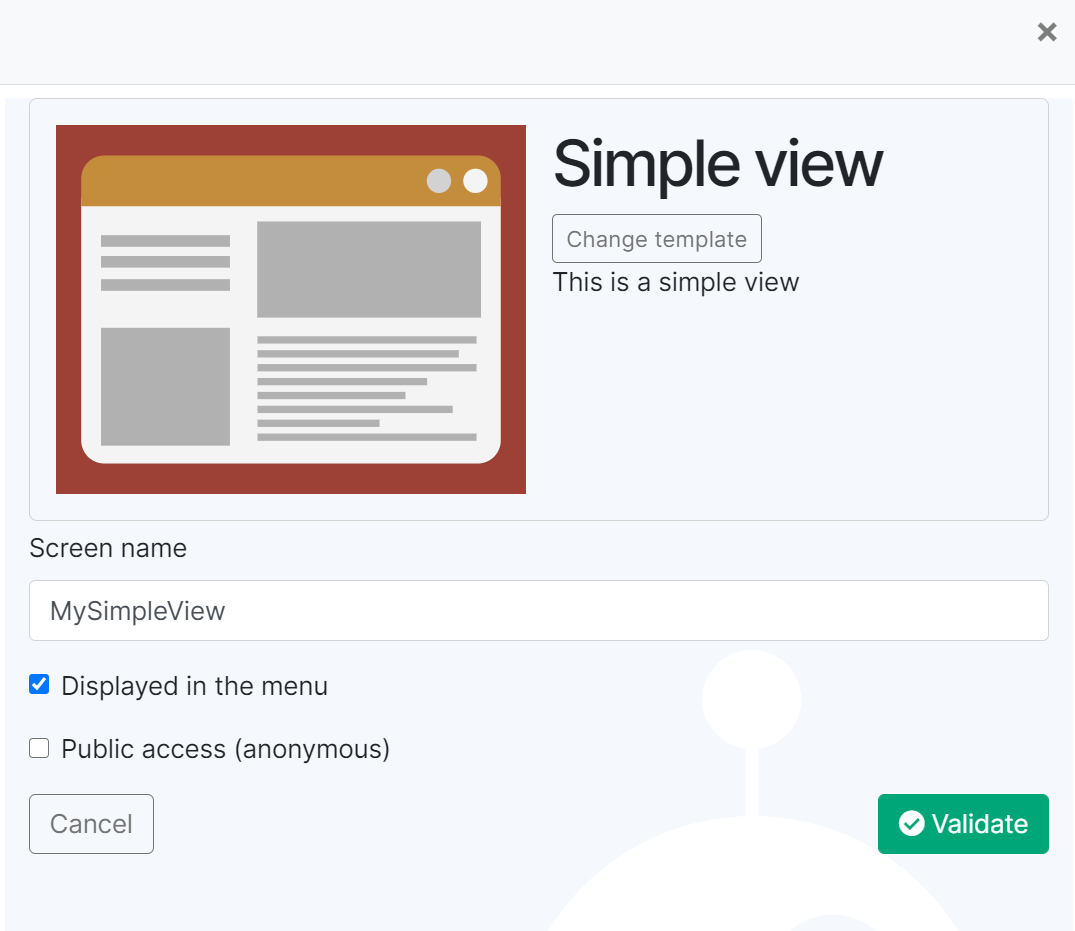
Simple View
This model is a basic blank page:
Form View
This model display 1 record of a data table (the columns detail of one raw) :
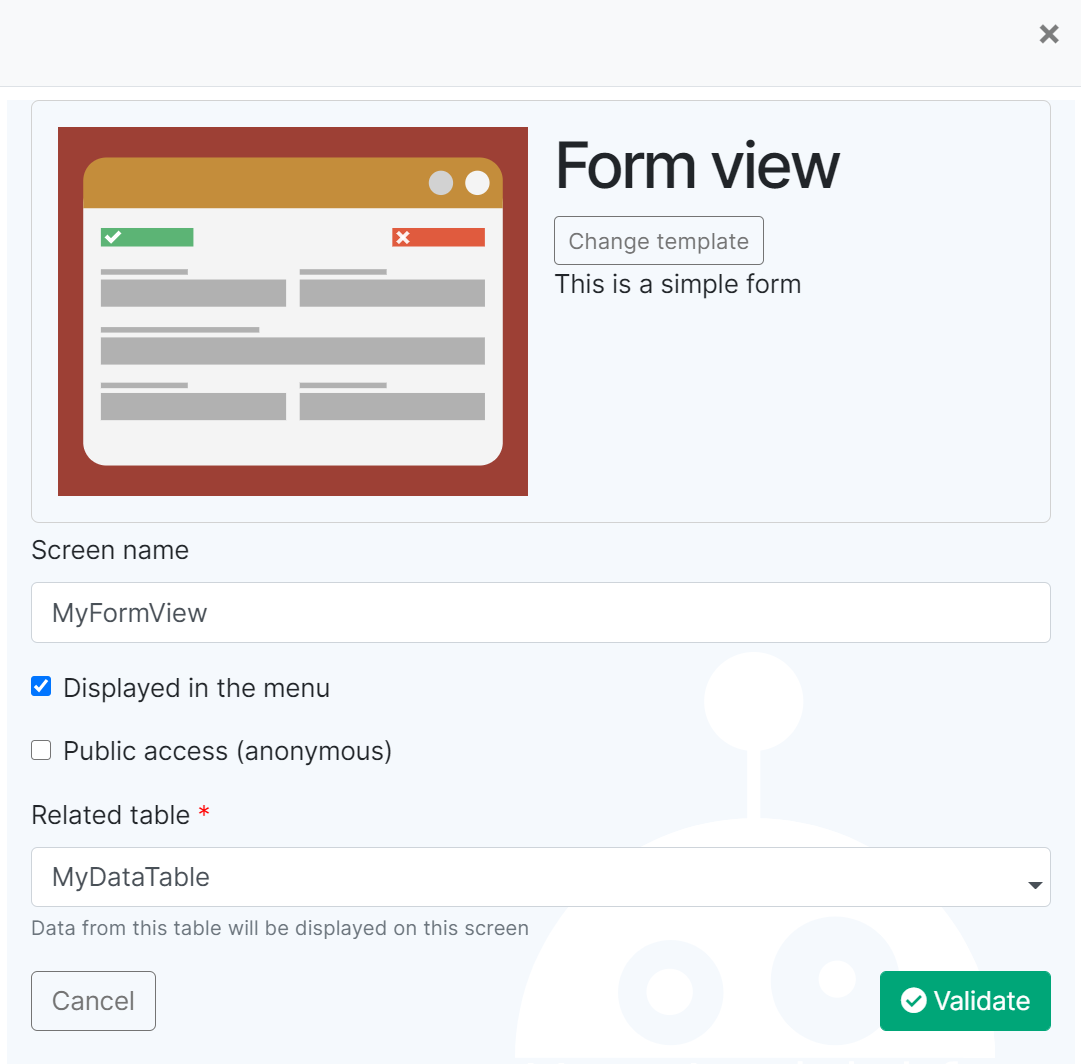
This model needs the ID of the record to display as a param of the screen URL. The model also proposes features to modify and update the record.
List View
This model display all the records of a data table as a grid table:

You can custom the screen by choosing the columns to display and their order.
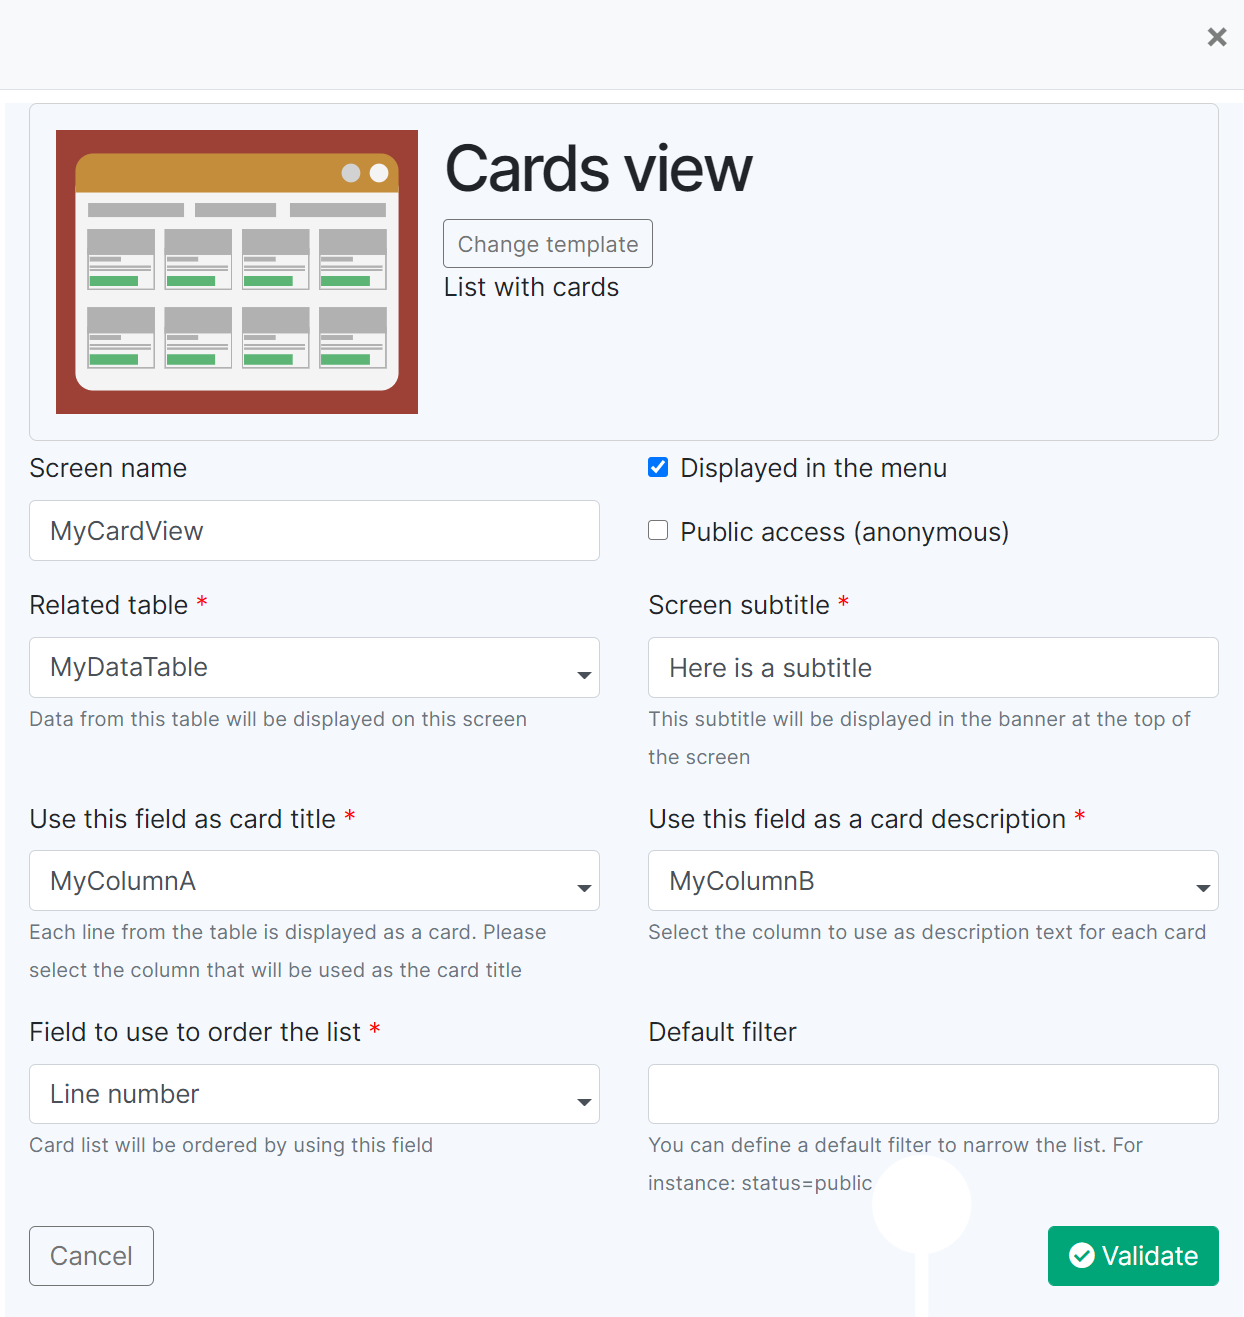
Cards View
This model is the same as the List View model, but the records are not displayed as a grid table but as Cards (looks like a e-shop catalog):
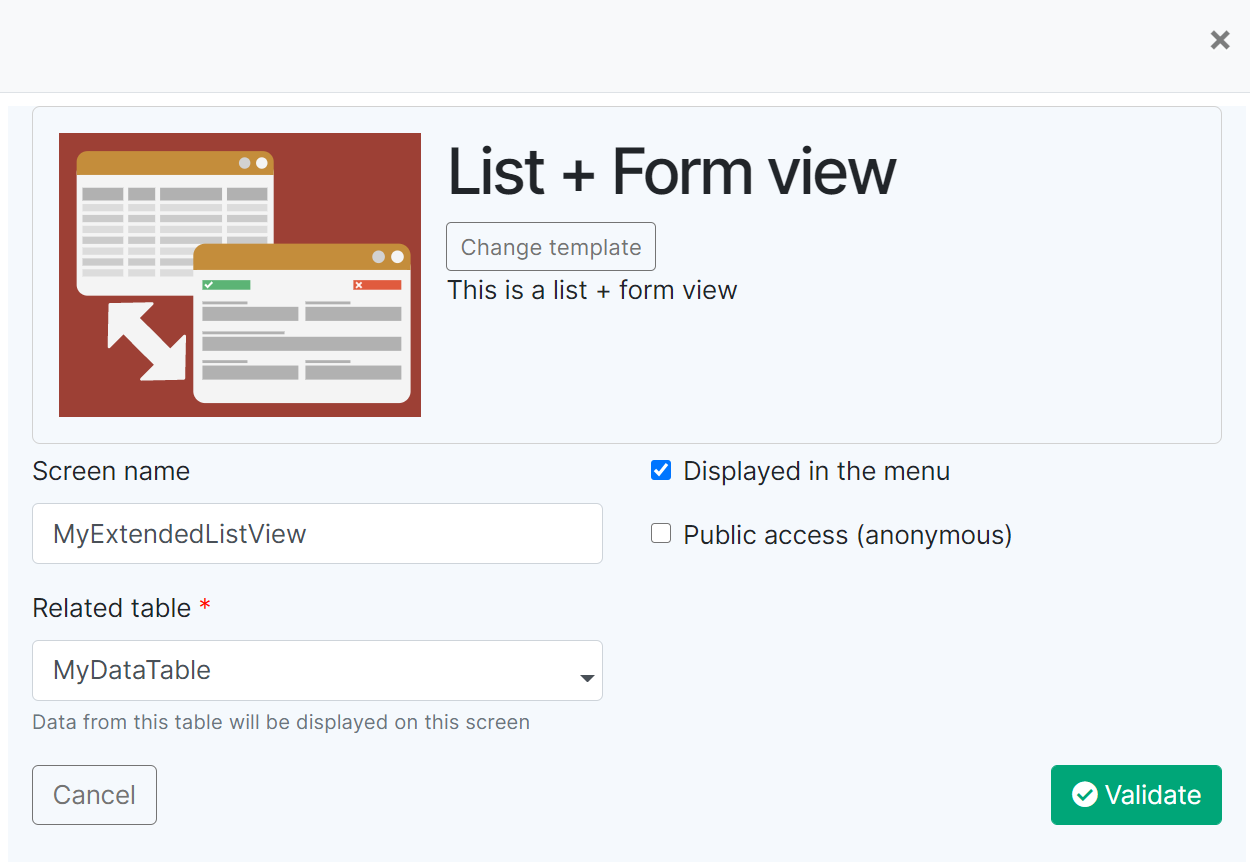
List+Form View
This extended model associate one List View with one Form View and will create 2 linked screens:
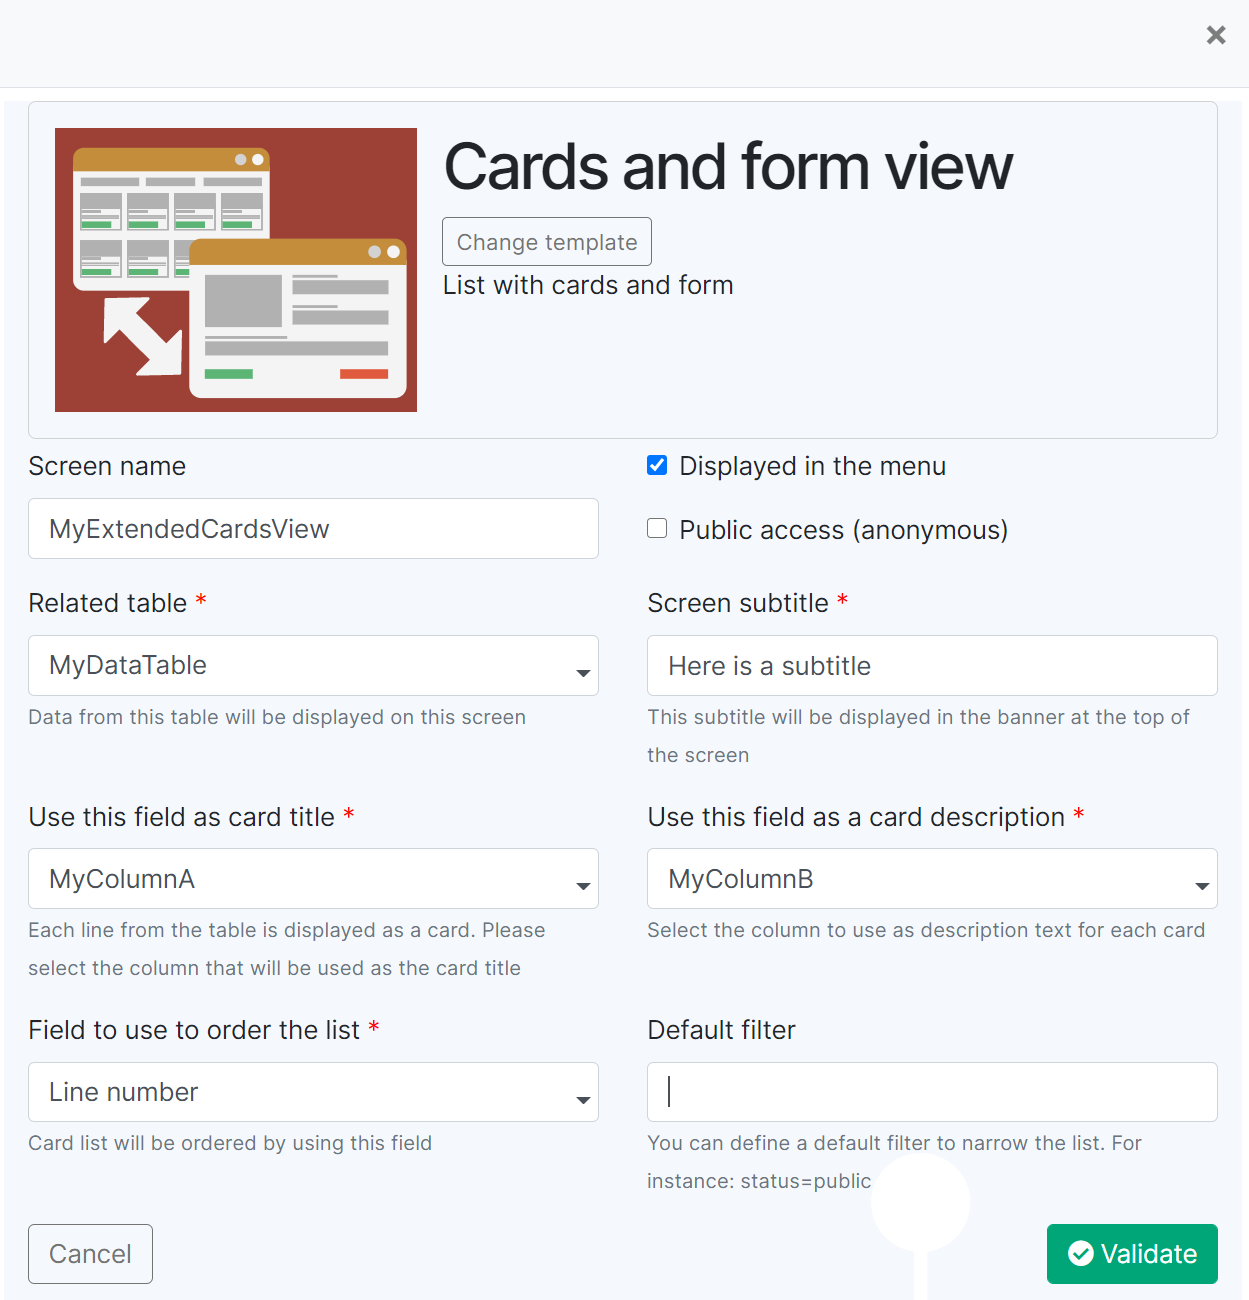
Card+Form View
This extended model associate one Cards View with one Form View and will create 2 linked screens:
Others ways to create a screen
As said in this chapter introduction there are many ways to create a screen and the screens models is the main way.
We can also create screens by the following processes.
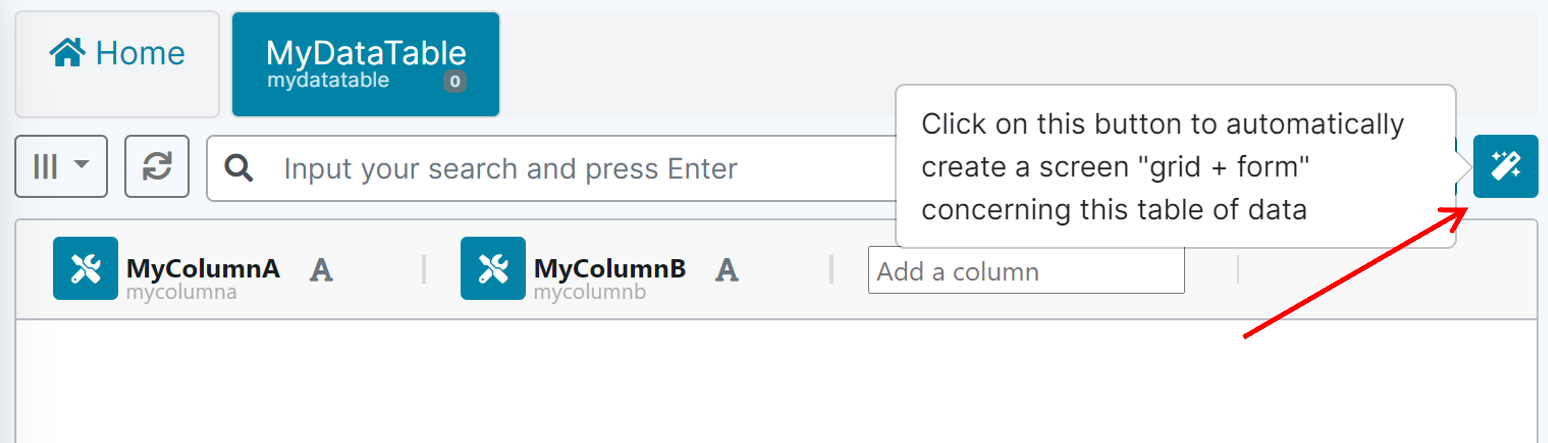
Creating Grid+Form views directly from the Data explorer.
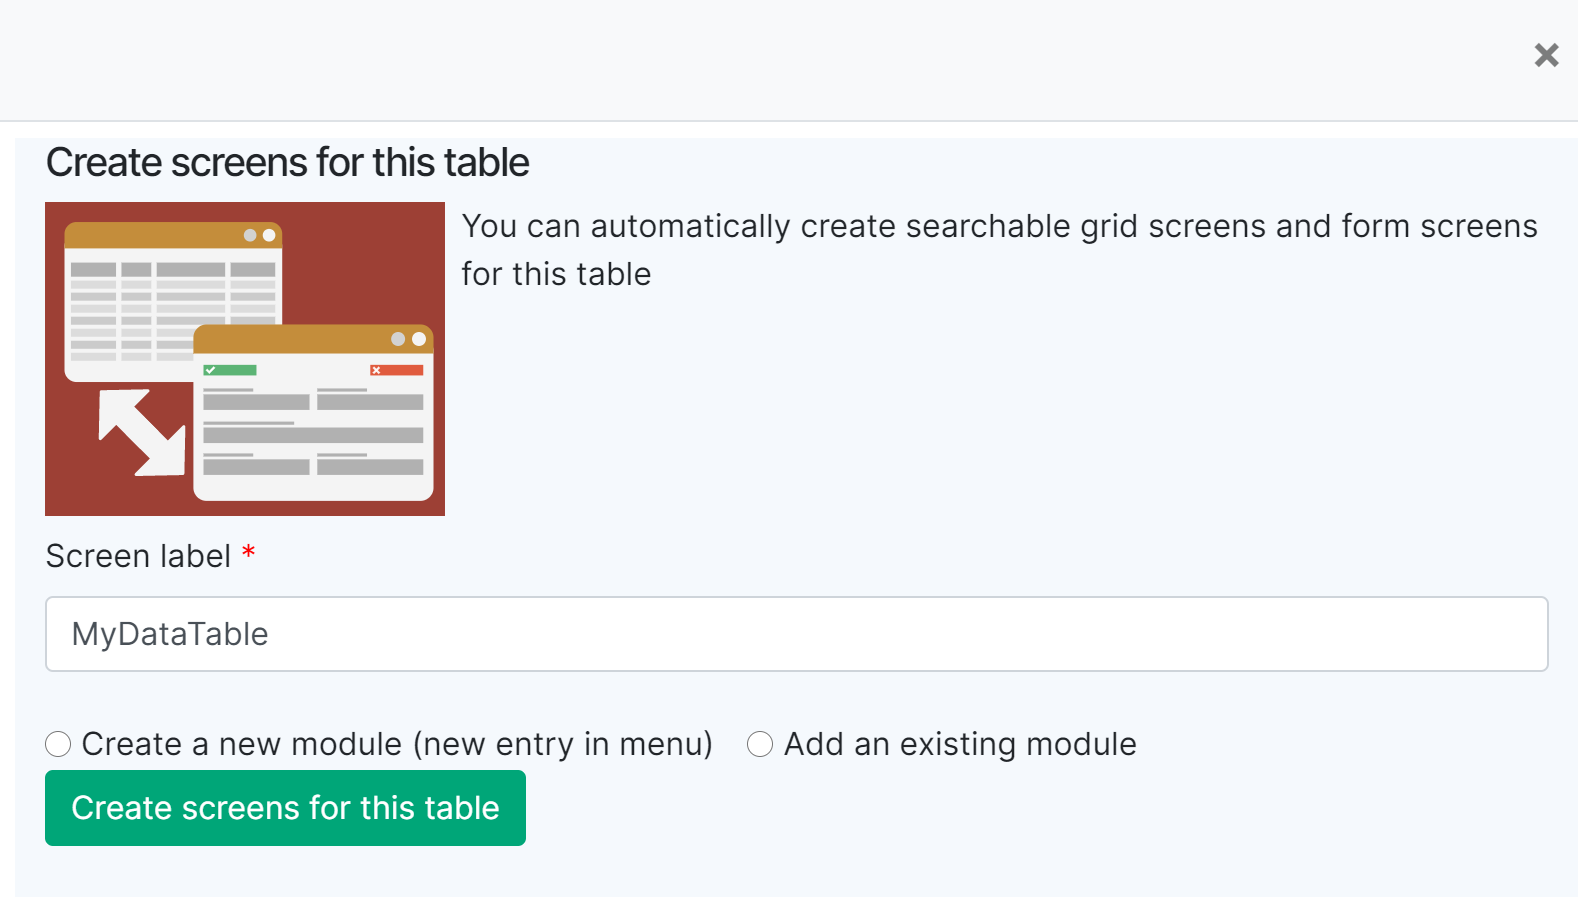
Each data table has a Wizard to create the corresponding views of your data in one click.
Then we name the screens and choose the Module entry:
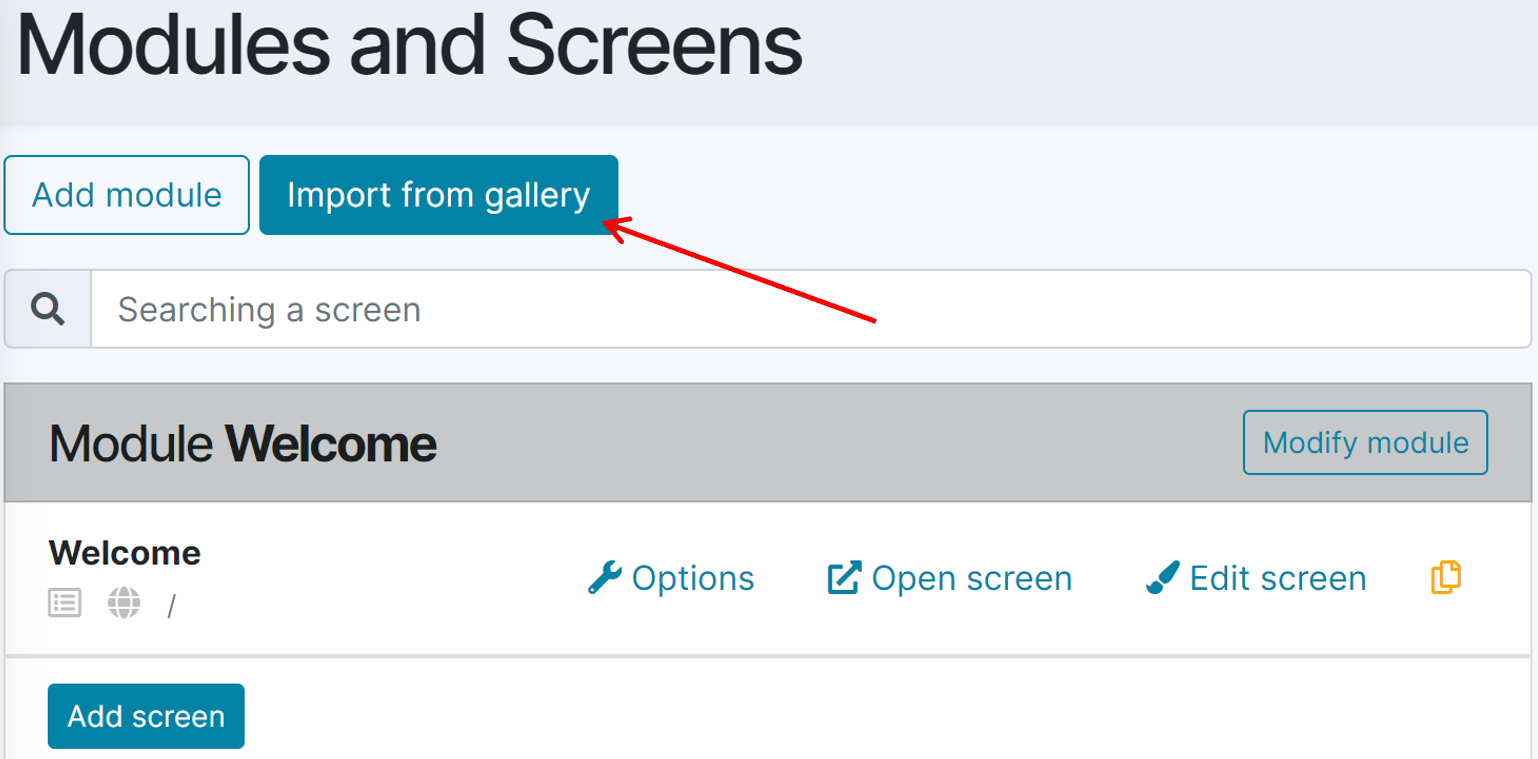
Using a BAMZ Application template.
These are already existing applications dedicated to one or few features (customers login features, calendar event features, etc.) that are proposed as templates. We can import any template from the Gallery in our existing application (we can also directly create an application based on one template). This will import all the data tables and all the screens of the template, in a Module entry named as the template. We can then decide to customize these screens and data tables as we can reorganize them freely.
Note : In one application, we can import as many templates as we want, but of course each template can be imported once only.
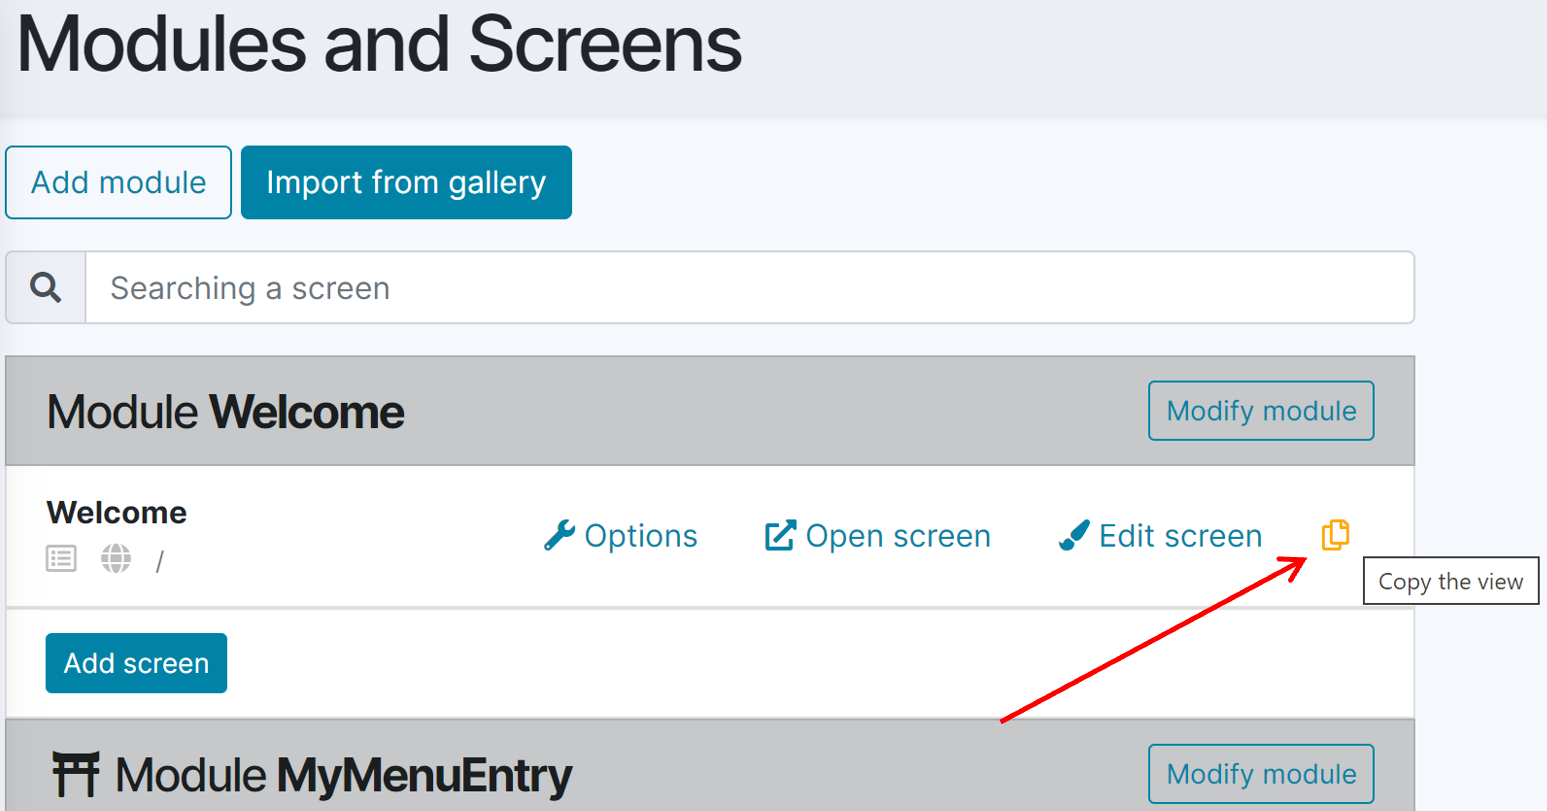
Copy an existing screen
As simple as we copy a file on a computer, we can just make a copy of an existing screen.
Screen Settings
For any existing screen we have access to its settings:
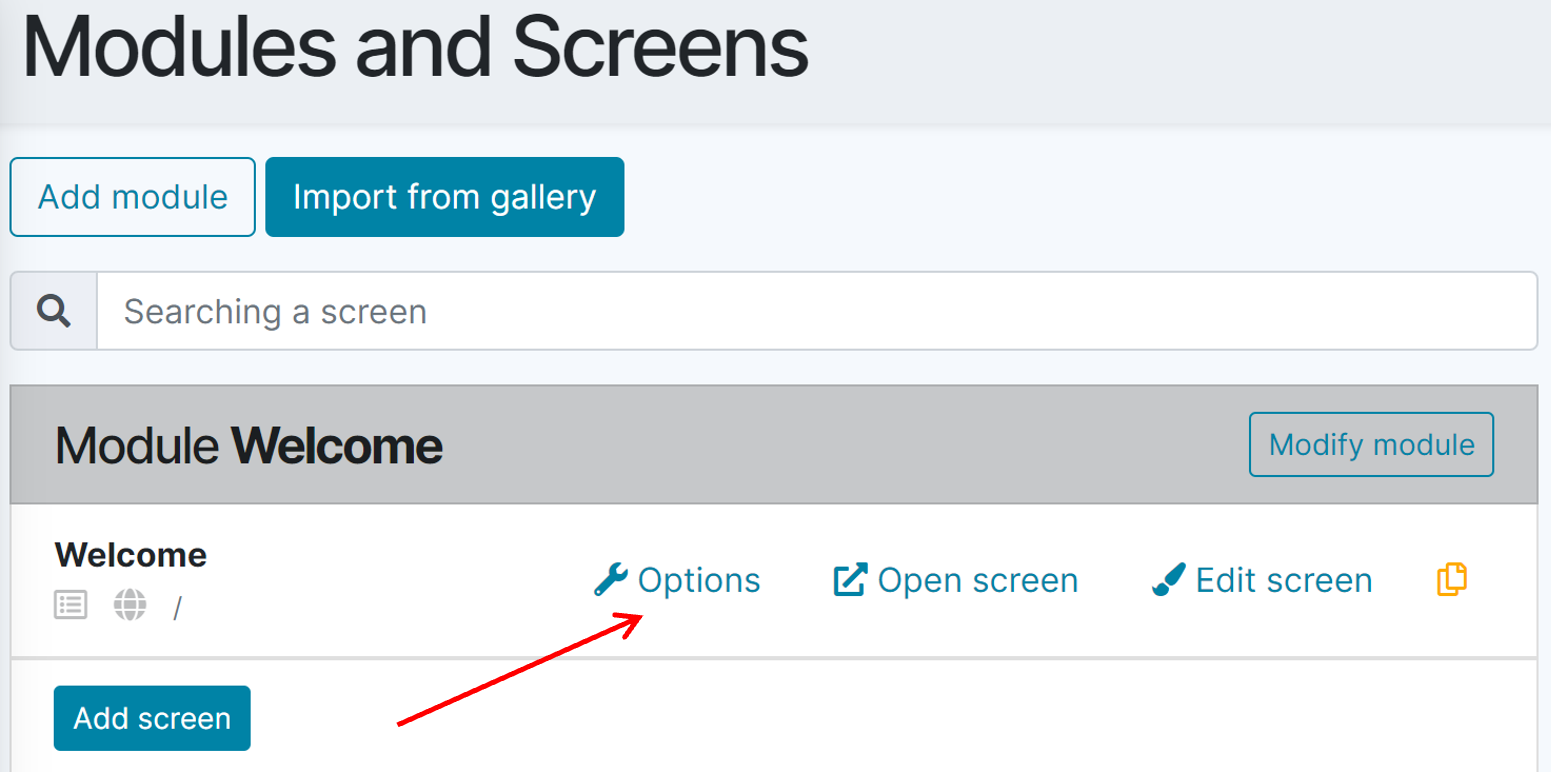
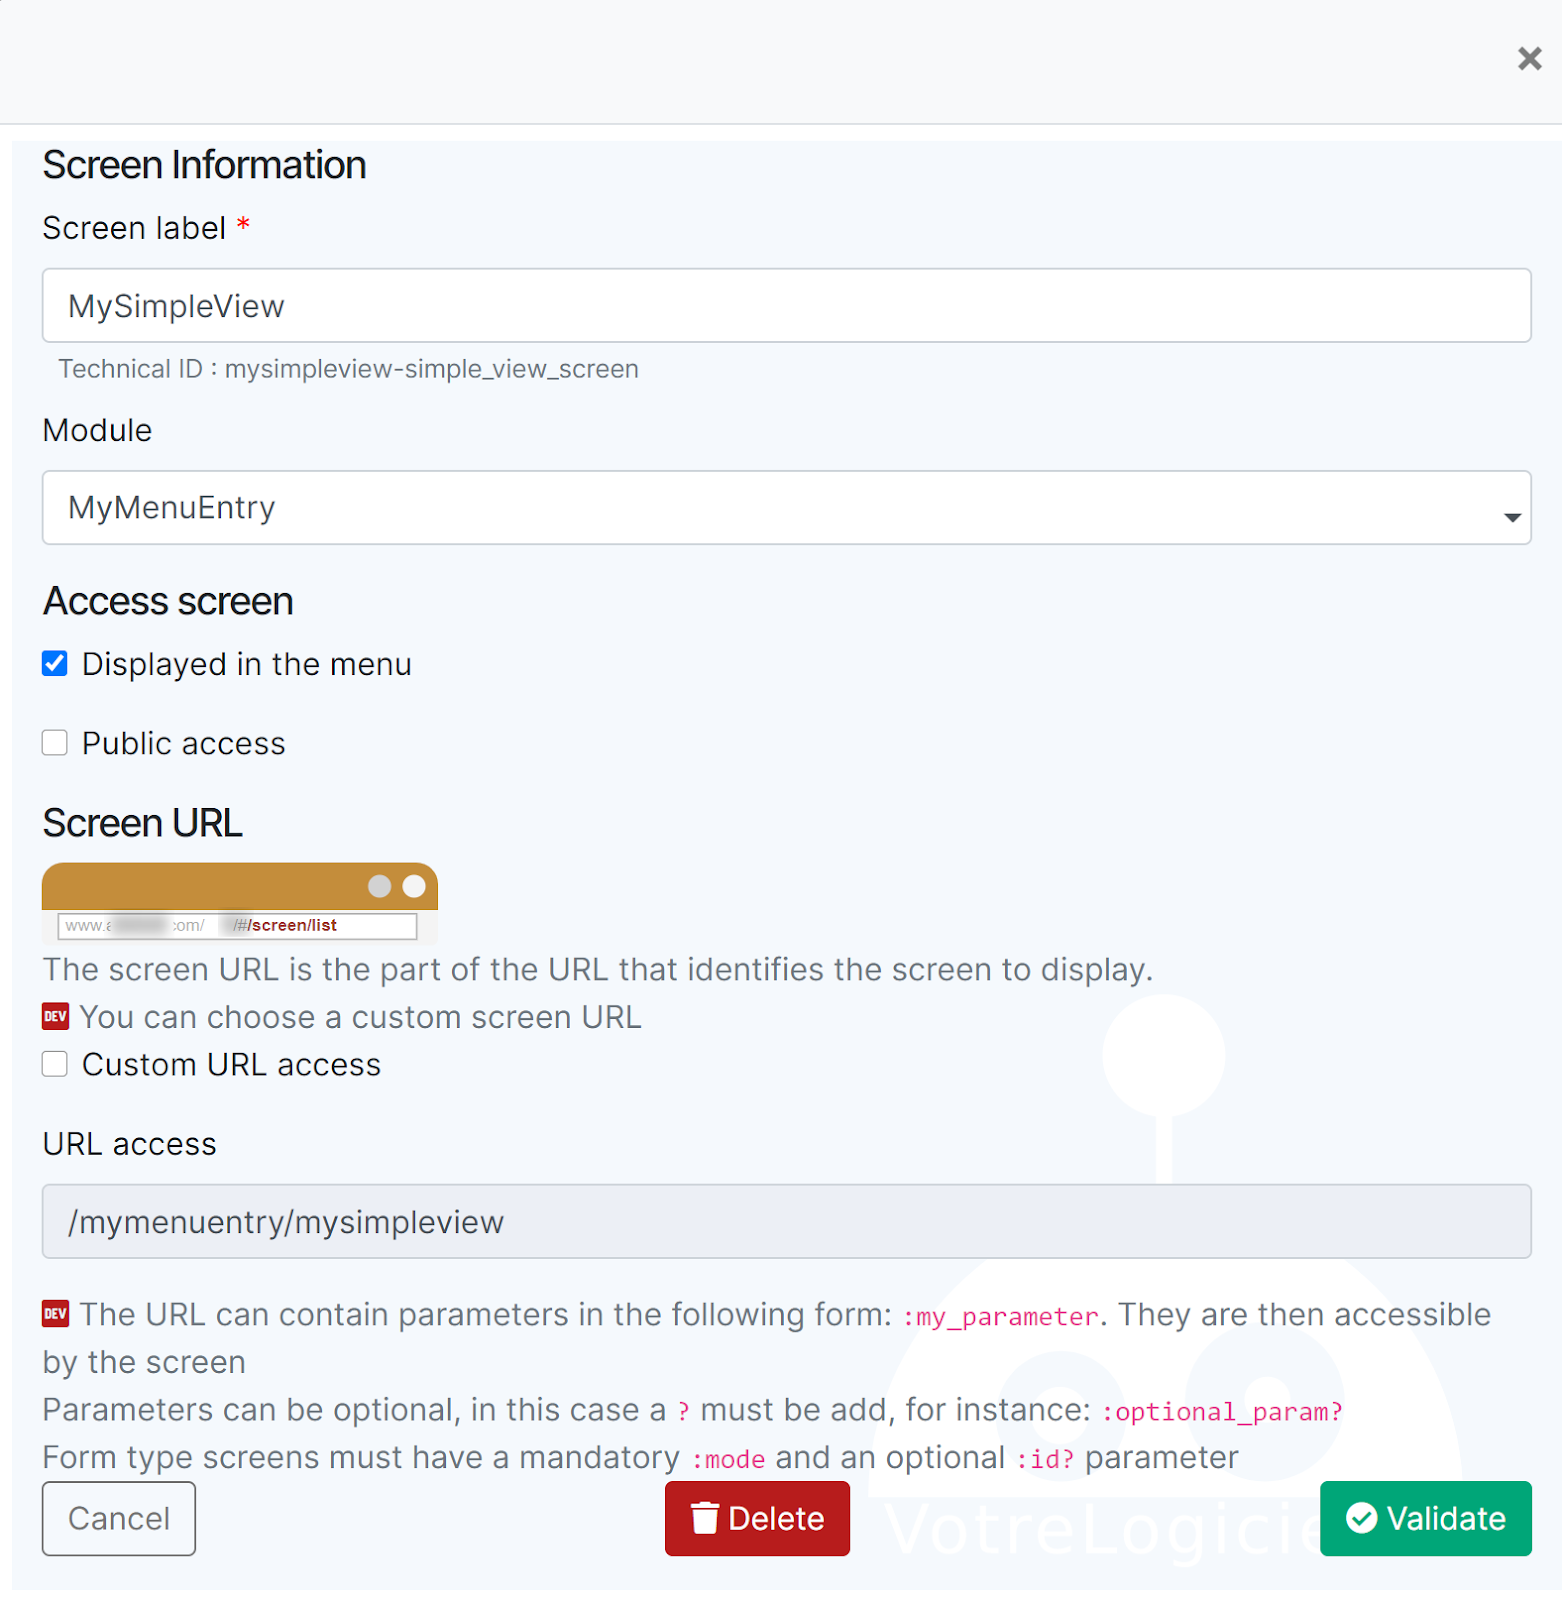
We can change the name of the screen to change the label in the menu entry, or we can decide to move the screen to another Module.
We can also decide to hide this screen in the menu. The entry will then be removed from the Module entry (but the screen remains in the module), and if a Module has no screen shown, then even the Module Entry will be hidden.
If we have set the Global Settings of the Application to be a Public application (it means that the app users don’t need to be connected with a BAMZ account to access the application), then we can decide which screens are public and can be displayed by any user. By default, any new created screen is NOT public and you have to choose carefully the screen that everyone can access. For example, we should not let everyone be able to create, modify or delete our data after we created the Grid+Form screens to manage our data, but we agree to let them use a product list or a product catalogue to search into our products.

Data fetching
In a screen, we need to fetch data from a table and display them
Simple fetching of a record
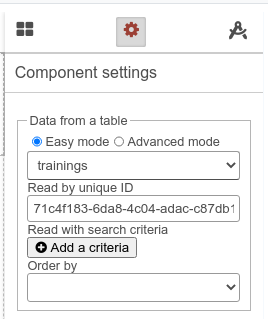
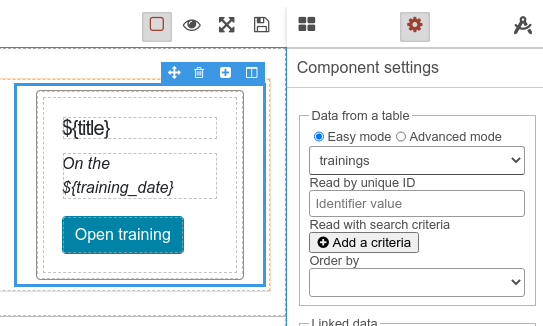
We select the element that will contains the data on you screen

In settings “Data from a table”, we choose the table (here it is the “trainings” table) and the unique ID to read :
What is the unique ID ?
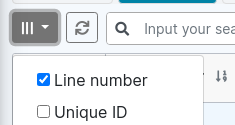
All tables have a unique ID. In data explorer, we can display it :
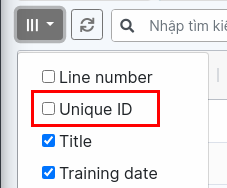
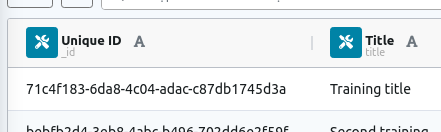
Technical hint : the unique id is always in the column _id
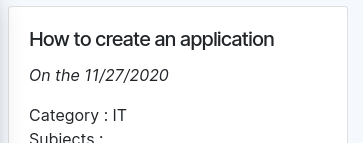
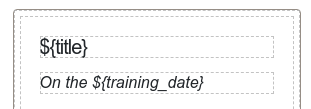
Display data with ${…} expressions
The easiest way to display data is to use the expressions like this :
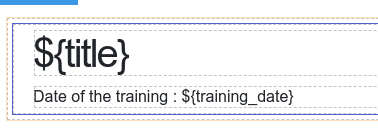
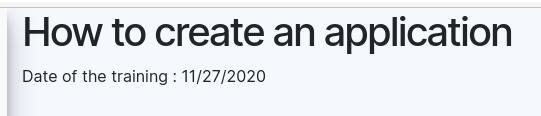
Give the result :
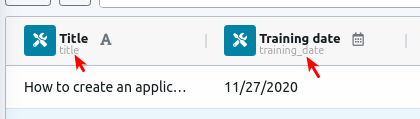
How to know the ${keyword} to use ?
The keyword to use is the technical column name. It can be get in the data explorer :
Simple fetching of many records
To fetch many records, we do a similar settings but we don’t set the unique ID :
This settings will get all records of the table trainings :

Filter records
It is possible to filter the record with search criteria :
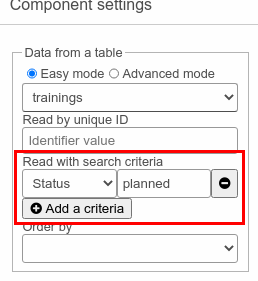
So it will display only the records which column status = planned
Advanced fetching query
It is possible to do advanced fetching queries using the advanced mode.
Query format
The full query format is as following : table name/joins parts/where conditions/order condition
Table name
It is the table from which fetch record
Joins parts
We can add data to other tables. The join formats can be :
…/join/other_table/…
Join records of another table. The other table should have a link to the main table.
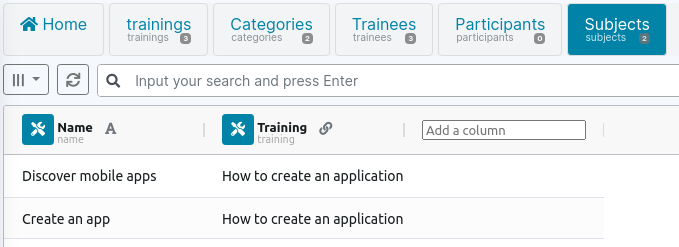
For example, we have a second table with the subjects of the training :
We want to get them, so we add a join to the subjects table :
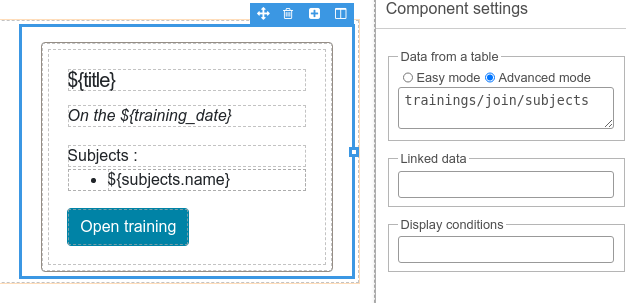
It gives us the following result :

…/join/other_table/as/name…
By default, the join takes the name of the table, if we want to use another name, we must specify it after /as/ keyword.
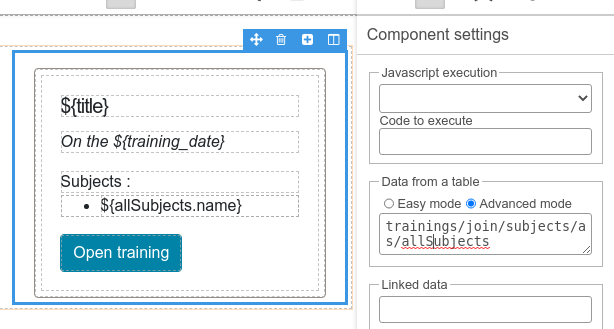
For example, we want to call subjects records “allSubjects”, so we use the query :
trainings/join/subjects/as/allSubjects
…/join/other_table/on/column…
If the target table has many columns linked to the main table, we need to give the column to use in the /on/ keyword. In our example we may want to specify explicitly that the training link in table subject is in training column : trainings/join/subjects/on/training
If we need to mix this with /as/ keyword, the /as/ keyword, we put it after : trainings/join/subjects/on/training/as/allSubjects
…/join/other_table/on/column/and/test…
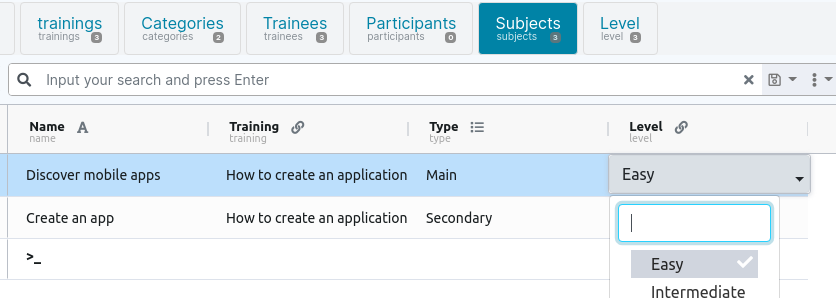
It is possible to add a test to the join. For example, we add a type column to our subject table to separate main subjects to secondary subjects:
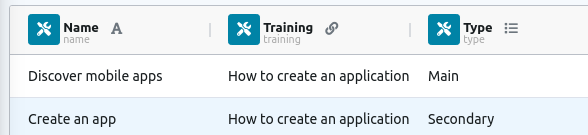
And we want to filter only on main subject, we can do a query like this : trainings/join/subjects/on/training/and/type=main
joinone
In the previous examples, we join a list of linked records. In the case where we need to get only one record, we can use the /joinone/ keyword instead of/ join/.
For example, our trainings are linked to a category (table categories) :
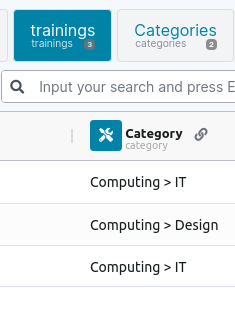
We fetch the category using a /joinone/ : trainings/joinone/categories/as/category
Chaining joins
It is possible to chain many joins, in our example if we want to fetch both subjects and category we can write : trainings/join/subjects/on/training/and/type=main/joinone/categories/as/category
Join from
In all previous examples, we are joining between the main table and a secondary table. What if we need to join from the secondary table to a third table ?
For example, if our subject has a level :
Here is the table level :
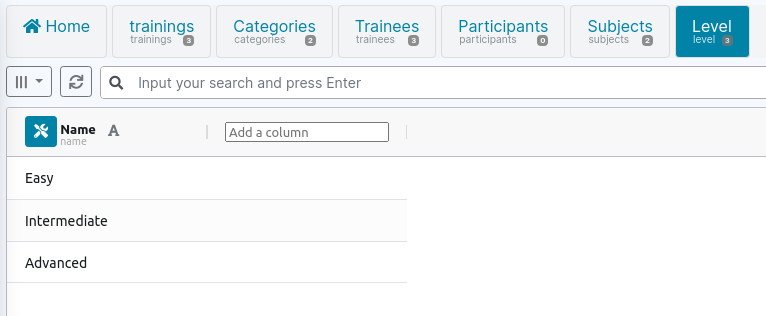
Now in our table subject, we choose the level :
To specify in the query that the level join must done from the subject table and not from the main trainings table, we add the /from/ keyword in the join : trainings/join/subjects/on/training/and/type=main/joinone/level/from/subjects
So the level will be fetched in the subjects records :
Note : if we used an alias for the first join, we must use this alias in the from : trainings/join/subjects/on/training/and/type=main/as/allSubjects/joinone/level/from/allSubjects
Where conditions
The where conditions allow us to add some filter condition on the query
Simple equal conditions
The most simple condition is the equal test, for example if we want to filter our trainings having status equals to “planned” : trainings/where/status=planned
We can use the character % as a wildcard, for example, the following query will give all trainings with title starting by ‘IT’.
trainings/where/title=IT%
or finishing by ‘IT’
trainings/where/title=%IT
or containing ‘IT’
trainings/where/title=%IT%
Chaining conditions
We can chaining conditions like this : trainings/where/status=planned/and/type=video
This query while filter training with status “planned” and type “video”
Using OR chaining
If we need an condition OR, for example the training planned OR done and of type video, we must add an /or(/ operator (note the parenthesis before the slash) and closing it by /)/, for example :
trainings/where/or(/status=planned/status=done/)/and/type=video
Other operators
Here is the list of all the available operators :
| Operator | Description | Example |
|---|---|---|
| = | Equals | /status=planned/ |
| ne | Not equals | /statut ne cancel/ |
| gt | Greater than ( > ) | /amount gt 1000/ |
| gte | Greater or equals ( >= ) | /amount gte 1000/ |
| lt | Lower than ( < ) | /amount lt 1000/ |
| lte | Lower or equals ( <= ) | /amount lte 1000/ |
| like | Comparison “LIKE” | /name like ?IT%/ |
| ilike | Comparison “LIKE” ignoring case | /name like ?it%/ |
| in | In a list of values | /statut in planned,done/ |
| nin | Not in a list of values | /statut nin planned,done/ |
| between | Between 2 values | /price between 10,80/ |
Order conditions
The last part of the query is the order condition to sort the data when you receive them.
The line number sorting
If we don’t specify any sorting, the records are sorted by default on the line number. Each time a record is added in a table, it gains a line number. It can be changed in the data explorer by dragging the line up and down using the handle on the left :
We can also display the line number :
So it means that by default the data are sorted in the same order that we see them in the data explorer
…/orderby/col…
To specify a sorting order, we can use the /orderby/ keyword. For example if we want to sort my trainings by it training date : trainings/orderby/training_date
Descending order
By default the sorting is done by ascending order. If we need descending order, we add the desc keyword after the column name : trainings/orderby/training_date desc
Chaining order
It is possible to chain orders on many columns. For example, sorting first on category and then by training date : trainings/orderby/category/training_date
Order on join tables
If we added some other tables using joins. It is possible to use columns of these tables in the order conditions. For example, sorting on the name of the category : trainings/joinone/categories/as/category/orderby/category.name
Limit the number of records
It is possible to limit the number of records that the query will return using the /limit/ keyword. For example, if we want only the first 5 records : trainings/limit/5
Skipping the first records (offseting)
It is possible to skip the first records and start to an offset using the /offset/ keyword :
Data bindings
In the previous chapter, we saw how to fetch data and had a brief preview of simple displays on the screen.
Now, we can dive into the data binding system.
Main concepts
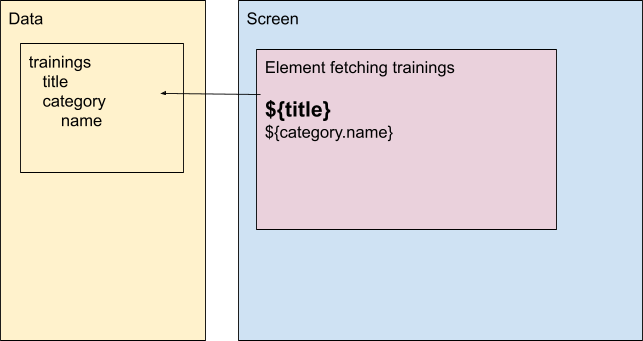
One dataset to rule them all
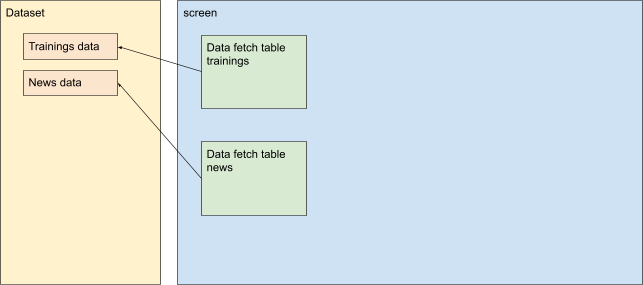
One screen is bound to one set of data. Even if the screen has many places that fetch data, they are all gathered in a common dataset.
For example in a screen that has a block fetching the ‘trainings’ on the top of the screen and fetching the ‘news’ on the bottom. The data of training are automatically set on the screen dataset :
2 ways binding
The binding between the screen element and data is a 2-way binding. This means that each time the data is modified, the screen is automatically updated (only the changing part are modified, it does not redraw all screen each time)
And each time a data is modified by the app user (using an input element for example), the data is updated.
For example, we have a text input linked to the data “name” which is also display on the screen, it is updated in real time as we type :

Display element
The display elements are something like a text, a title, a link,… in short something that mainly displays some textual data.
By binding the element to a data, the content of the element will be filled with the data content.
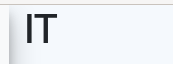
For example, the contents of this title element will be replace by the value of data “name”

It gives the following result (name value is “IT”) :
Expression ${…}
Because it is often not very convenient to have an element for each piece of data to display, you can use expressions inside all textual elements. The expression has the form ${name_of_data_to_display}.
For example, the following expression :
will be displayed like this :
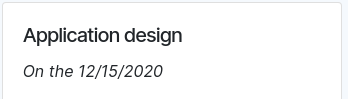
The expression is a shortcut to display data in a text, but it also automatically formats the data. In the example above, the ${training_date} has been automatically displayed with locale date format.
The format is automatically done by detecting the data type. Sometime we need to specify that the data is from a table column to apply the proper formatting of this column. This is especially useful for column “choice in other table” to display the other table label instead of the ID, or for decimal numbers column to display the configured number of decimals. To specify the column use the followinf syntax :
${my_table.my_column:the_bind_value}
It is also possible to format dates with the following syntax :
${DATE:FORMAT:value_date_format}. For example : ${DATE:DD/MM:mydate}
The format use momentjs syntax
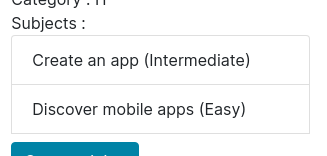
Display sub-data
We often have data and sub data. In our fetching example above, we fetched the training and a sub data that is his category. The structure or received data is like this :
- title
- training_date
- category
- name
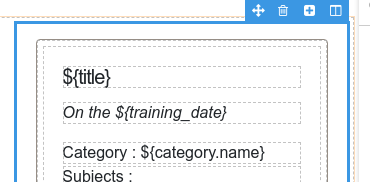
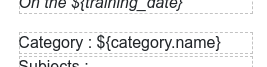
To display the name of the category, we must give its path category.name :
Repeating elements
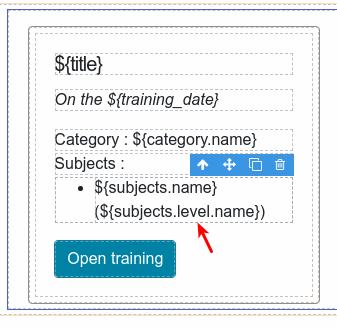
We also often need to repeat an element for each record of a list of data. In our training example above, we get a training that has many subjects and we want to display each of its subjects.
The data structure is like this :
- title
- training_date
- subjects (many records)
- name
- level
- name
To repeat an element for each record of a list, just link the element to the list, for example the list item element is linked to the subjects :
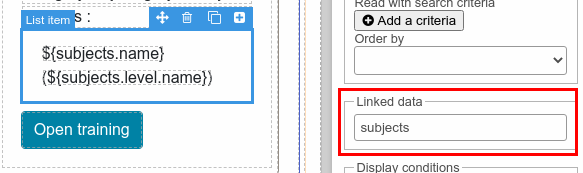
The element will be repeated as many time as there is records inside subjects :
 Warning: It is the element itself that is repeated.
To display data inside the repeating element, you have to give the whole path (subjects.name, subjects.level.name)
Binding scope
The fetching data elements (see previous chapter) are automatically bound to the records returned by the fetching query.
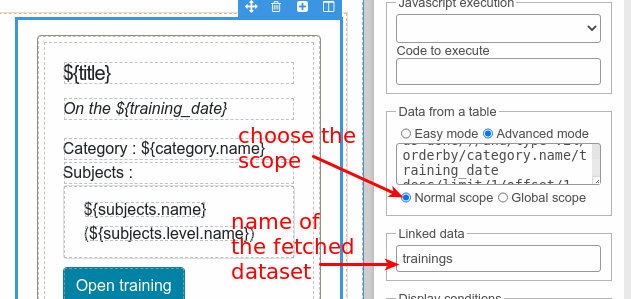
By default, inside this repeating element, the data path are considered as isolated inside the fetched data :
Meaning that the data paths (title, category.name) refers to the data inside the fetched sub dataset. Most of the time it is handy because we only want to display data from this sub dataset. This is the normal scope.
But sometimes, we want to access the whole screen dataset. In this case, we must choose the global scope :

In this scope, you have access to the whole screen dataset. In this case you must access to the fetched data using the full path (trainings.title, trainings.category.name)
_globals entry
The screen data always have a special entry : _globals.
It contains the following information :
- context
- app (the application information)
- name : the application name
- description : the application description
- isAdmin : is the current user an admin
- isMember : is the current user a member (admin is always considered as member)
- isAnonymous : is the current user anonymous
- schema : database schema
- currentLang : the current language
- currentUser :
- login
- name
- lang
- app (the application information)
- params (parameters received in URL)
- pathname (URL path of the screen-
The _globals entry is not affected by the scope. It is always available even in isolated (normal) scope.
Design
Screen scripting
It is possible to add scripts on all screens. You can access script edition using the button JS in expert mode :

The document object
The document object is similar to the usual document in any HTML page (Document - Web APIs | MDN) but is restricted to the current view.
HTML events
The first usage of scripting is to listen to the HTML events.
While it is still possible to use the pattern document.getElementById(…).addEventListener(…) but it is not the recommended way because using the data binding system the HTML markup is dynamically repeated so it would oblige you to check for new element and add event listener on each data change.
The recommended way is to define the z-on-event attribute on the HTML element like this : 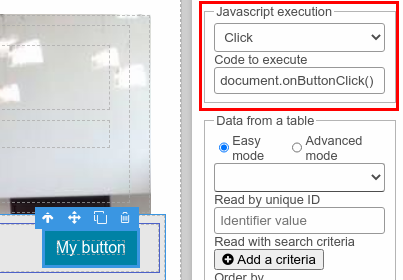
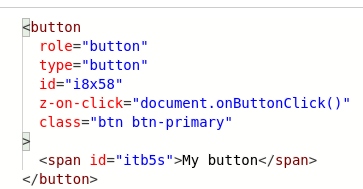
The content of the attribute z-on-event is executed, so don’t forget the parenthesis at the end (document.onButtonClick() )
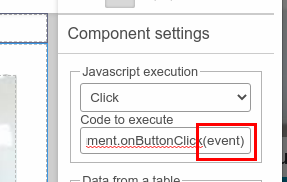
Access event
If you need to access the event object, you can pass it as parameter to your function :
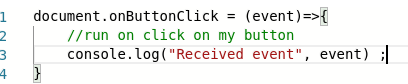
Result on click :

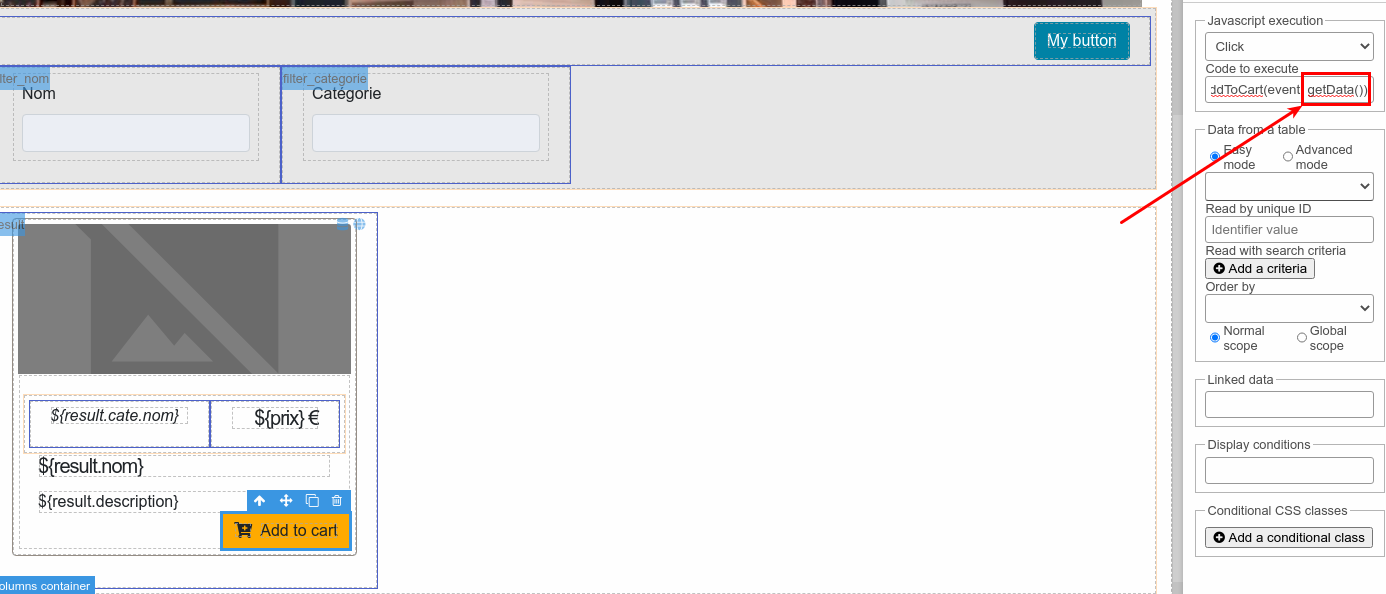
Access data
In case when your element is inside a data loop, you often need to access the data item occurrence linked to the source element. You can pass getData() to your function :

onLoad and onReady functions
These 2 functions are run on the screen loading process.
The cycle is :
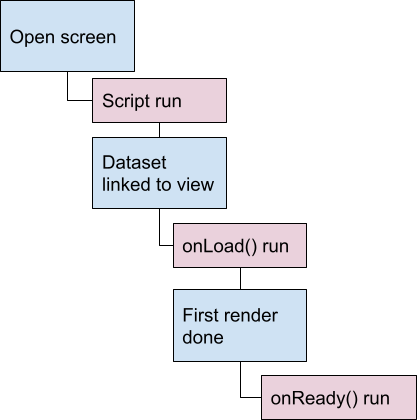
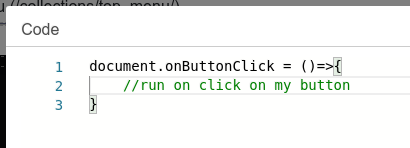
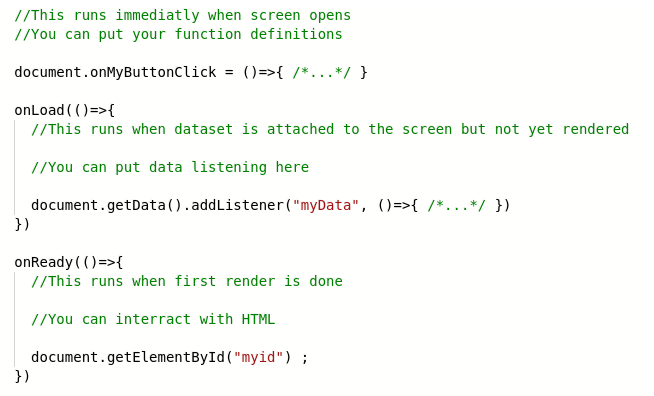
At the root of the script, you should put the functions definitions (such as function that run on HTML events)
The onLoad() function is called when the dataset is linked to the view but not yet rendered. It is useful when you need to listen to data (see next chapter)
The onReady() function is called when the first render is done. It is also the moment when the waiting spinner is removed, so for the user it is like the “screen becomes available”. It is useful to access to HTML element or to run some action “on screen open done”
Scripting with data
Accessing data
As explained in the data binding part, all data rendered in the screen is in an unique dataset structure.
You can access this dataset using document.getData().
For example, this element fetch some data and put them in “result” variable

In the code, you can access is at document.getData().result :
![]()
Remember that all data fetching returns and render an array of element, even if you are explicitly fetching one element (fetch by id for example)
For example, we explicitly fetch one product by its id here :
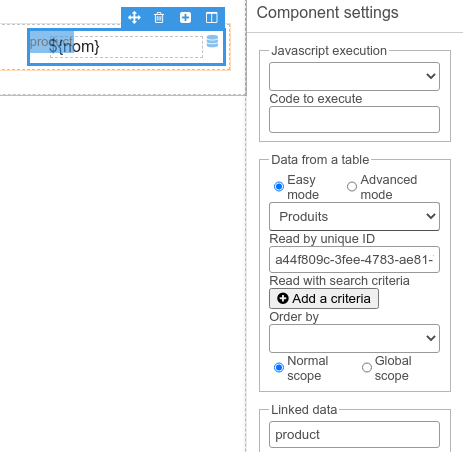
The fetched data is an array :

So when we are sure that we have a unique instance, we can access it using : document.getData().product[0]
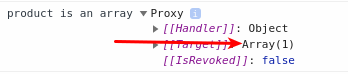
Why are data Proxies ?
As we see in the previous screenshot, data is a proxy object. It is because of the 2-ways binding system. Proxy detects changes and automatically renders them on the screen.
The data objects can be used as normal data objects. The proxy is totally transparent, it just reveals himself in debug and console.
Data is meant to receive only “data”. It means that we should not put “exotic” objects in it such as HTML element instances for instance.
Listening data
The 2-ways binding saves us much scripting as most of the rendering job is done automatically. But sometimes we want to react to data modification.
One way to do it is to listen on change events on the HTML element but it is not always a good solution (sometimes there is no element to listen or there are many elements to listen). A better way is to listen for data modification.
This can be done on the dataset or any data inside using document.getData().addListener().
For example, we have some lines with price and quantity and we want to compute the total on each modification :
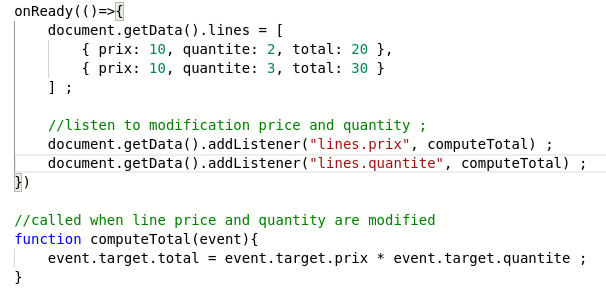
Modifying the quantity or the price update automatically the total :

The advantage of listening for data is that if the data is modified somewhere else, it will run the same. For example, we add a button to do +1 on the quantity :
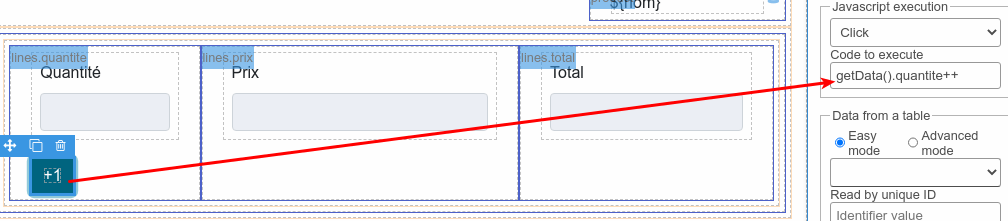
Click on the button also trigger the total compute without further modification in the code.
In the example above, we listened to each properties but it is also possible to use wildcards to listen to all properties :

The event provides the following elements :
- oldValue : the value before modification
- newValue : the value after modification
- property : the modified property
- target : the object on which the property has been modified

Stop/Start autobinding
Sometime, it is useful to modify the data without trigger the autobinding and data listener. It is possible using the functions stopAutoBind() and startAutoBind() on data object :
document.getData().stopAutoBind() ;
document.getData().foo = "bar" ; // This doesn't trigger autobind nor data listener
document.getData().startAutoBind() ; //Further modify will trigger autobind. This will also do a rebind
document.getData().startAutoBind(false) ; //Give a false to parameter to reactivate autobind but without do an immediate rebind
Check form fields
When working on a form, we often need some custom validation for fields. To do so, we rely on the standard form validation function : setCustomValidity().
If everything is OK, just set an empty message : myfield.setCustomValidity(“”) ;
If the value is incorrect, set the message : myfield.setCustomValidity(“Something wrong”)
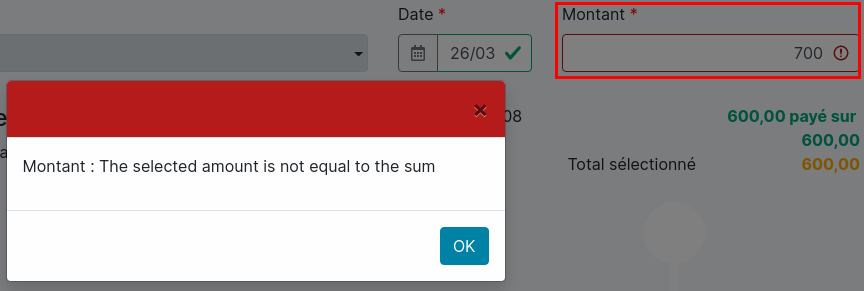
For example :

will give the error on validation :
Refresh screen
Sometimes we need to refresh the screen as we just entered it. You can do that using : document.getData()._globals.actions.refresh()
Note : the onReady function will be called on refresh
Helpers functions
Some functions are available wherever you are in the application.
Database API
The database can be reached using the window.restApi object.
read
The function window.restApi.read(table, id) reads one record in a table with its id (the column _id, see database management chapter).
For example, to get a record from a table “products” :

Note the await keyword to wait for the response of the server. To use await, you must add the async keyword on the function containing async calls
list
The function window.restApi.list(table, filters) lists many records from a table with filters.
For example, read all products having type sandwich :

search
The function window.restApi.search(table, params) is a more advanced search function to get records from a table.
The params can contains the following parameters :
- join : join to other tables. Can be a single join or an array of many joins. Each join can define :
- table : the table to join (required)
- one (true/false) : if true it join only to get 1 record not array
- on : the join condition
- from: the table to join from (if not main table)
- as : the alias to use
- where : the where condition. Can be a single where condition or an array of condition. It is a string following syntax described in data fetching chapter
- orderby : the order by condition. Can be a single order by condition or an array of conditions. It is a string following syntax described in data fetching chapter
- limit : the max number of record to fetch
- offset : the read offset
Example :
create
The function window.restApi.create(table, record) creates a new record in a table.
createMany
The function window.restApi.createMany(table, records) can create many records in a table
It does the same as create but insert many records at once
update
The function window.restApi.update(table, id, record) updates a record in a table

It is also possible to update or insert many records :
restApi.update([
{
table: “mytable”,
action: “update”,
id: idOfRecord,
record: { …}
},
{
table: “mytable”,
action: “insert”,
record: { …}
}
]
delete
The function window.restApi.delete(table, id) deletes a record in a table

Waiter
When running an action that requests the server and waits for the response, we may want to show the waiting spinner to the user and display an error if the server call fails.
To do that, add the waiter function to your call :
Dialogs
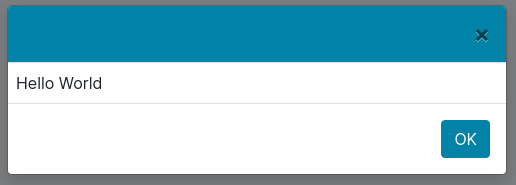
dialogs.info
Display an info message
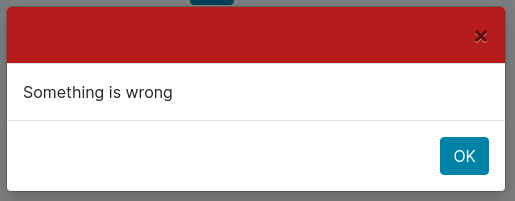
dialogs.error
Display an error message
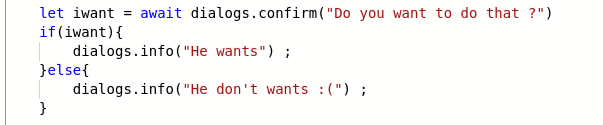
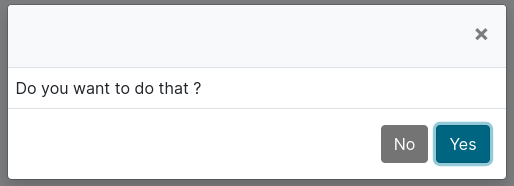
dialogs.confirm
Display a confirm dialog
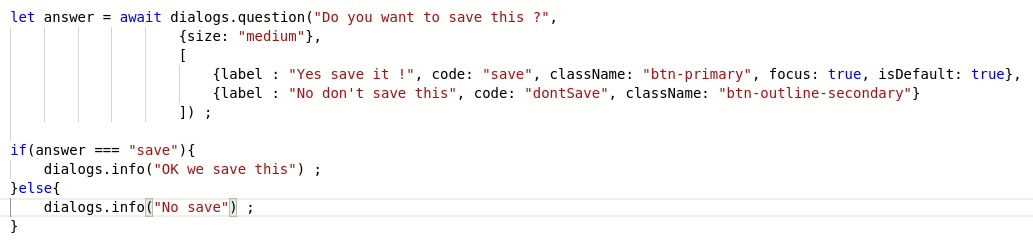
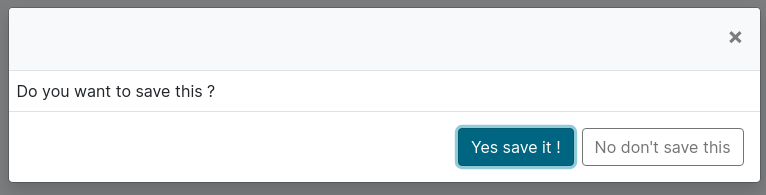
dialogs.question
Display a question dialog
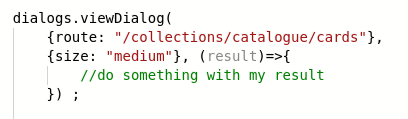
dialogs.viewDialog
Display a screen in a popup

The route params gives the screen route to open inside the popup.
The size can be : small, medium, large or fullscreen
When the screen is open in a popup, it has an extra action function to close the popup : document.getData()._globals.actions.closePopup(result)
The caller can get the result value by giving a callback to the function :
Import external library
If we need to import external library, we can use document.loadScript to import it into our screen
In this example, we import the aalib that allow to render an image in ascii art and use it to render Mona Lisa :
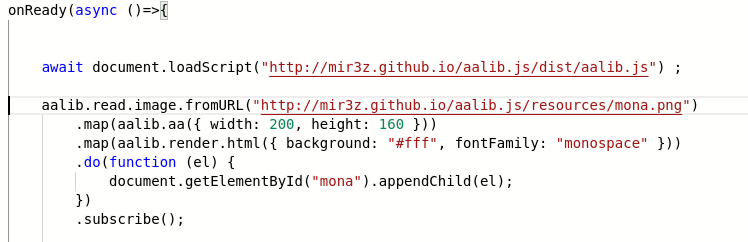
Gives use the result :

It is also possible to load CSS file using document.loadCss.
Excel and CSV export
It is possible to manually export data to Excel or CSV using actions.createXls(data) and actions.createCsv(data).
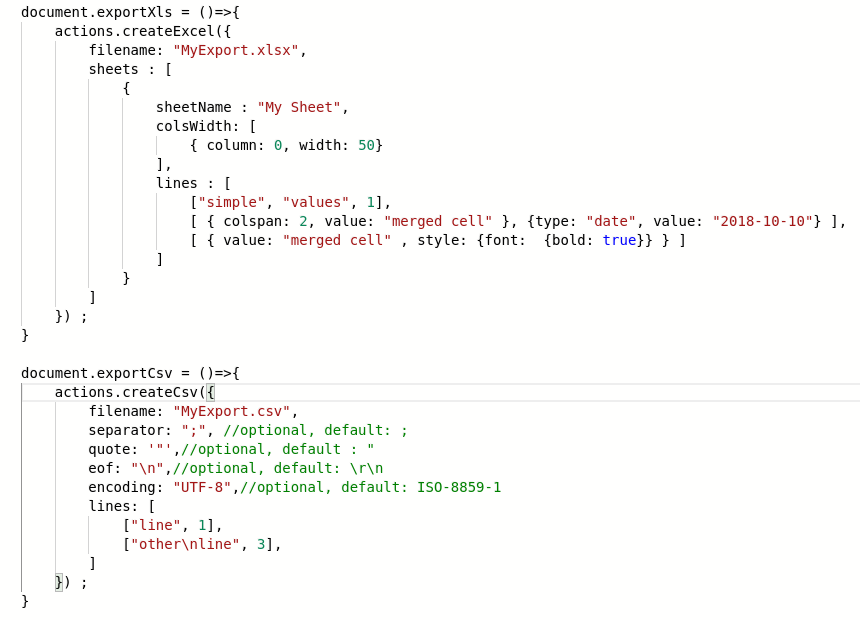
The data format for createXls is :
{
filename : “MyExport.xlsx”,
sheets : [
{
sheetName : “My Sheet”,
colsWidth: [
{ column: 0, width: 50}
],
lines : [
[“simple”, “values”, 1],
[ { colspan: 2, value: “merged cell” }, {type: “date”, value: “2018-10-10”} ],
[ { value: “merged cell” , style: {font: {bold: true}} } ]
]
}
]
}
The data format for createCsv is :
{
filename: “MyExport.csv”,
separator: “;”, //optional, default: ;
quote: ‘"’,//optional, default : "
eof: “\n”,//optional, default: \r\n
encoding: “UTF-8”,//optional, default: ISO-8859-1
lines: [
[“line”, 1],
[“other\nline”, 3],
]
}
Global scripting
If we need to reuse some function in many screens, it is possible to define them in menu “source code” :
If is possible to define javascript function :

And CSS classes :

Server-side notification
In real-time application, we need to notify all clients that something change in the data on the server.
It is possible to use web socket to notify the client from the server.
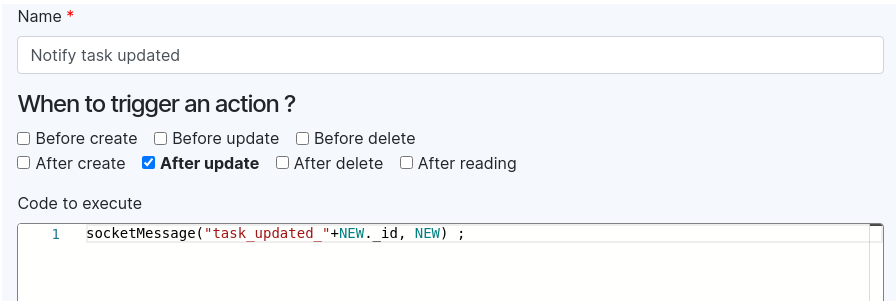
In table action, call socketMessage function :
In screen script, use socketio.on to listen to notification :

Connectors / Synchronizations
The connectors and synchronizations system allows you to connect your application to other application and exchange data automatically
Create a connector
To create a new connector, go to the “connectors” menu :
Most of the time, you need to configure an authorization to the other application.
Google API authorization
The Google API authorization system is integrated. You have to choose the “Google API” connector :

You must set the Client ID and secret provided by your Google console :

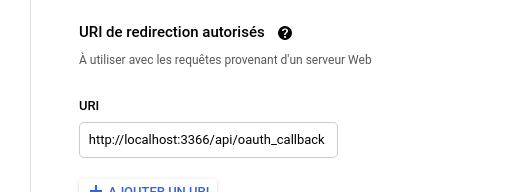
You also need to reference the callback URL in the Google console :
And you must give the list of scope you need to use (see the documentation of each Google API you are using)
You will then need to initiate the authorization with your google account :

It will open the Google authorization screen to allow your connector to access the API.
Once it is done, your authorization is ready to use.
If you changed the scope, you can redo the connection:

OAuth2 authorization
You can connect to any system supporting OAuth2 authorization :
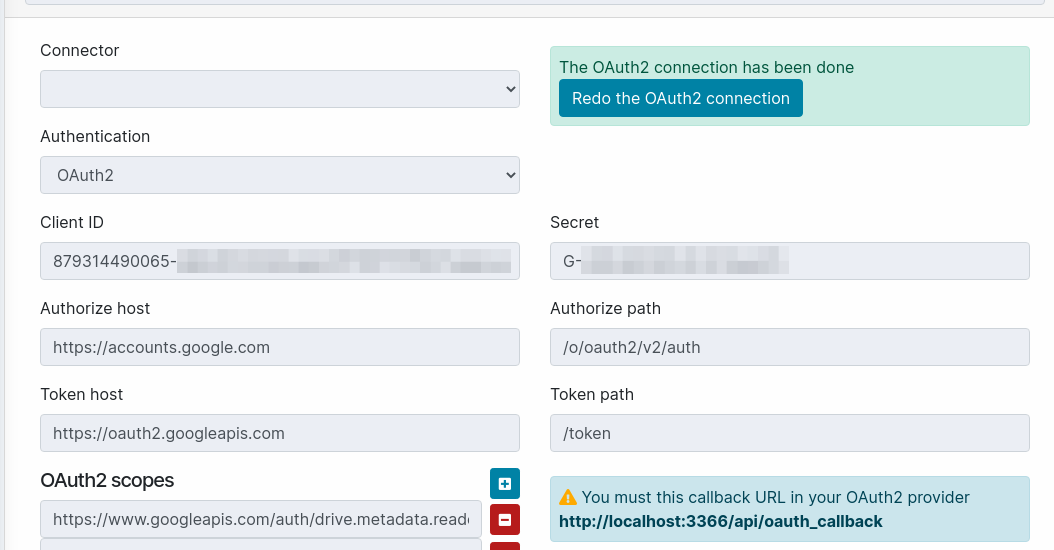
You need to configure the client ID, secret, authorize and token hosts and paths.
You can set scopes if needed and you should configure the callback URL in the OAuth2 provider settings.
You will then need to initiate the authorization with your google account :
It will open the provider authorization screen to allow your connector to access the API.
Once it is done, your authorization is ready to use.
If you changed some settings you can redo the connection:
NTLM authorization
It is also possible to use a NTLM authorization. You need to set the user and password (and optionally the domain)

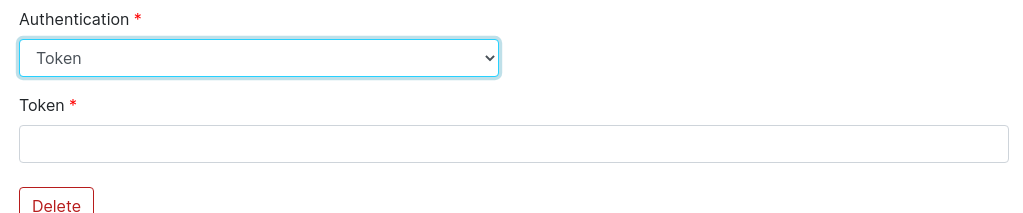
Token authorization
If the other application give you a simple token to use in header “Authorization”, you can choose the “token” authorization :
Steps
A connector contains many steps. Each step receives the data from the previous step.
HTTP request step
The HTTP request step is used to call the other application to retrieve some data :
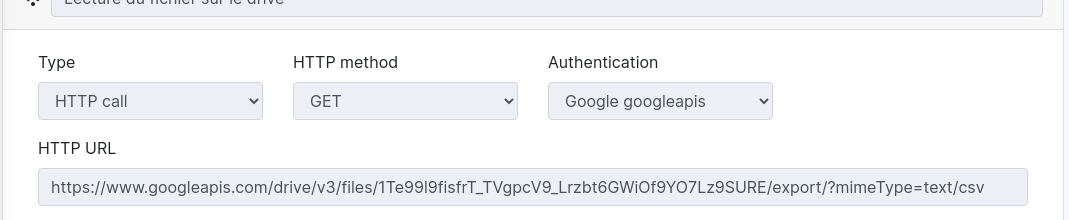
You need to set the HTTP method and URL and the authentication to use (as configured previously)
If you need to automatically parse the data, it is possible to use the auto parsing :

Two parsing are available : CSV and Excel
Read in database step
The read in database step do a read in the database :
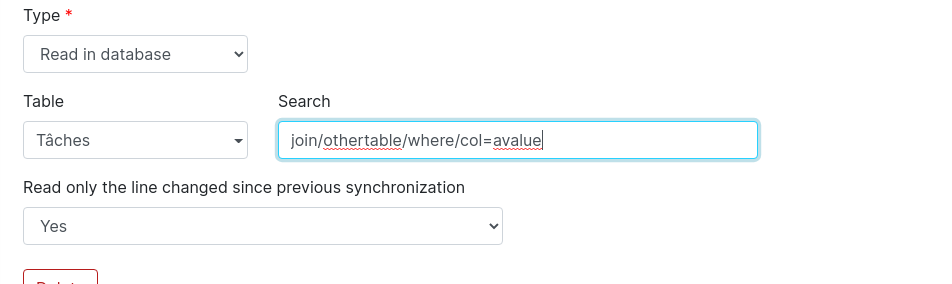
The search syntax is the same advanced query format in screen editor (see previous chapter).
If you need to send only new lines or modified lines, you can set the option “read only the line changed since previous synchronization”
Write in database step
The write in database step takes the data received from previous step and write them into a table in the database :
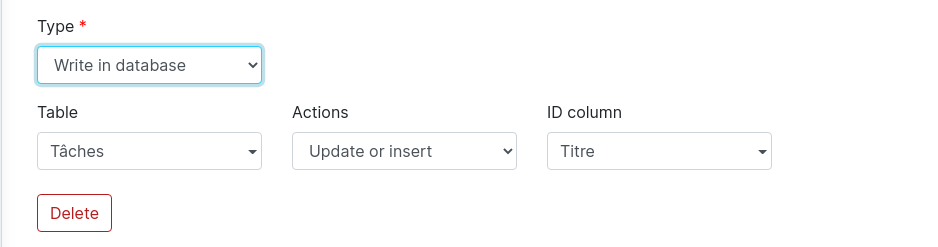
You must choose the table, the action to do (insert, update or insert, detelet) and the column to use as ID (so it can do an update of the existing line or an insert)
Run code step
The run code step can run arbitrary code on the data.
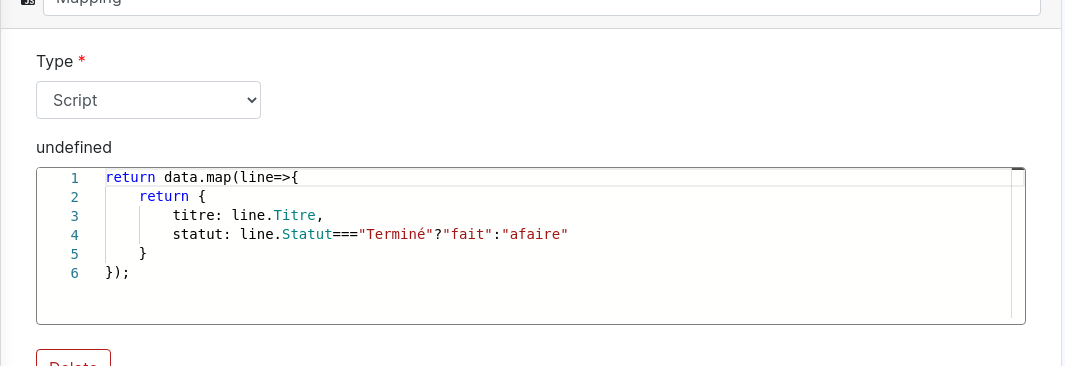
The syntax is standard javascript. the data received from the previous step are in variable data. The raw data are in variable dataText.
It is possible to do database read using :
let readResults = await databaseRead({
     mysearch: {
          table: "mytable",
          searchFirst: { col: "value"}
     },
     othersearch: {
          table: "othertable",
          search: { col : { $lt: 5000 }}
     }
}) ;

readResults.mysearch; //contains found record or null
readResults.othersearch; //contains array of result
It is also possible to do database write using :
let writeResults = await databaseWrite(
     [
          { table: "mytable", action: "insert",
               record: { col: "value" } },
          { table: "mytable", action: "update",
               record: { _id: "id", col: "value" } },
          { table: "mytable", action: "delete",
               where: { _id: "id"} },
          { table: "mytable", action: "updateOrInsert",
               where: { code: "code"},
               record: { col: "value", code: "code" } },
          { table: "mytable", action: "updateWhere",
               where: { code: "code"},
               record: { col: "value" } },
     ])

writeResults; /*
     [
          { table: "mytable", action: "insert",
               record: { _id: "generatedId", col: "value" } },
          { table: "mytable", action: "update",
               record: { _id: "id", col: "value" } },
          { table: "mytable", action: "delete",
               records: [ list of deleted records ] },
          { table: "mytable", action: "updateOrInsert",
               record: { _id: "generatedId", col: "value" } },
          { table: "mytable", action: "updateWhere",
               records: [ list of updated records ] },
     ]
     */
If you need to send data to next step, you have to return them : return dataForNextStep;
You can also log information using console.log, console.info, console.warn and console.error. All log will be displayed on the synchronization report.
Run a synchronization
Synchronization runs are in the menu “synchronizations” :
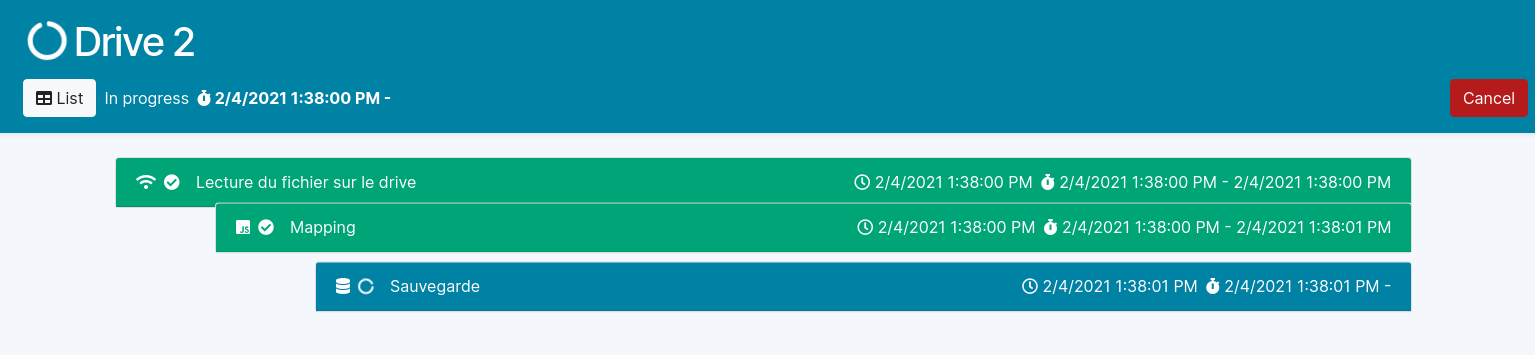
The synchronization report is updated in real time when is running on the server :
Engine technical design
This part is for internal use only. It describe the engine technical design
Data storage
By data storage we means all data except the application itself (it screens and source codes)
Database
All data of an application is stored in a dedicated PostgreSQL database.
The name of the database is the code of the application
Binary storage
The binary data (media, binary column type) are stored in the database too but not directly inside the table of the column.
In the database, there are two “hidden tables” (hidden because they are not displayed to the user in the explorer screen) : _binary_index and _binary_storage.
When a binary data is inserted in the media/binary column, a new record is created in _binary_index with the metadata of the binary file (filename, mimetype, size and checksum hash) and a second record is created in _binary_storage with the data blob.
The id of _binary_storage table is the checksum hash of the file so if the same binary is use many time in the application, it will have many _binary_index but only one _binary_storage.
For example, in the table book, there is a media column containing the cover img and the user put the same image for the 2 foundation books, its binary is stored only once :

When the column is changed or the line is deleted, the linked _binary_index is deleted. If there is not more _binary_index linked to a _binary_storage, the _binary_storage is deleted.